
What if a finished coding activity is the least useful evidence of what a student has learned? A project can be complete while the ideas behind it remain unclear. That’s why tracking student progress in coding should focus on what learners can explain, test, debug, and improve, not just what they submit.
It can be difficult to see growth when coding platforms report progress differently, and reviewing every line of code can quickly overwhelm a teacher’s schedule. You need evidence that is consistent enough to guide instruction and simple enough to collect during everyday classroom routines.
This guide offers a practical framework for observing coding knowledge, technical skills, and problem-solving without turning assessment into a second job. Learn how to capture evidence during projects, identify students who need support or a fresh challenge, and use short check-ins and reflections to make growth visible. From completion tracking to demonstrated understanding, build a manageable system that helps each learner take a useful next step.
Key Takeaways
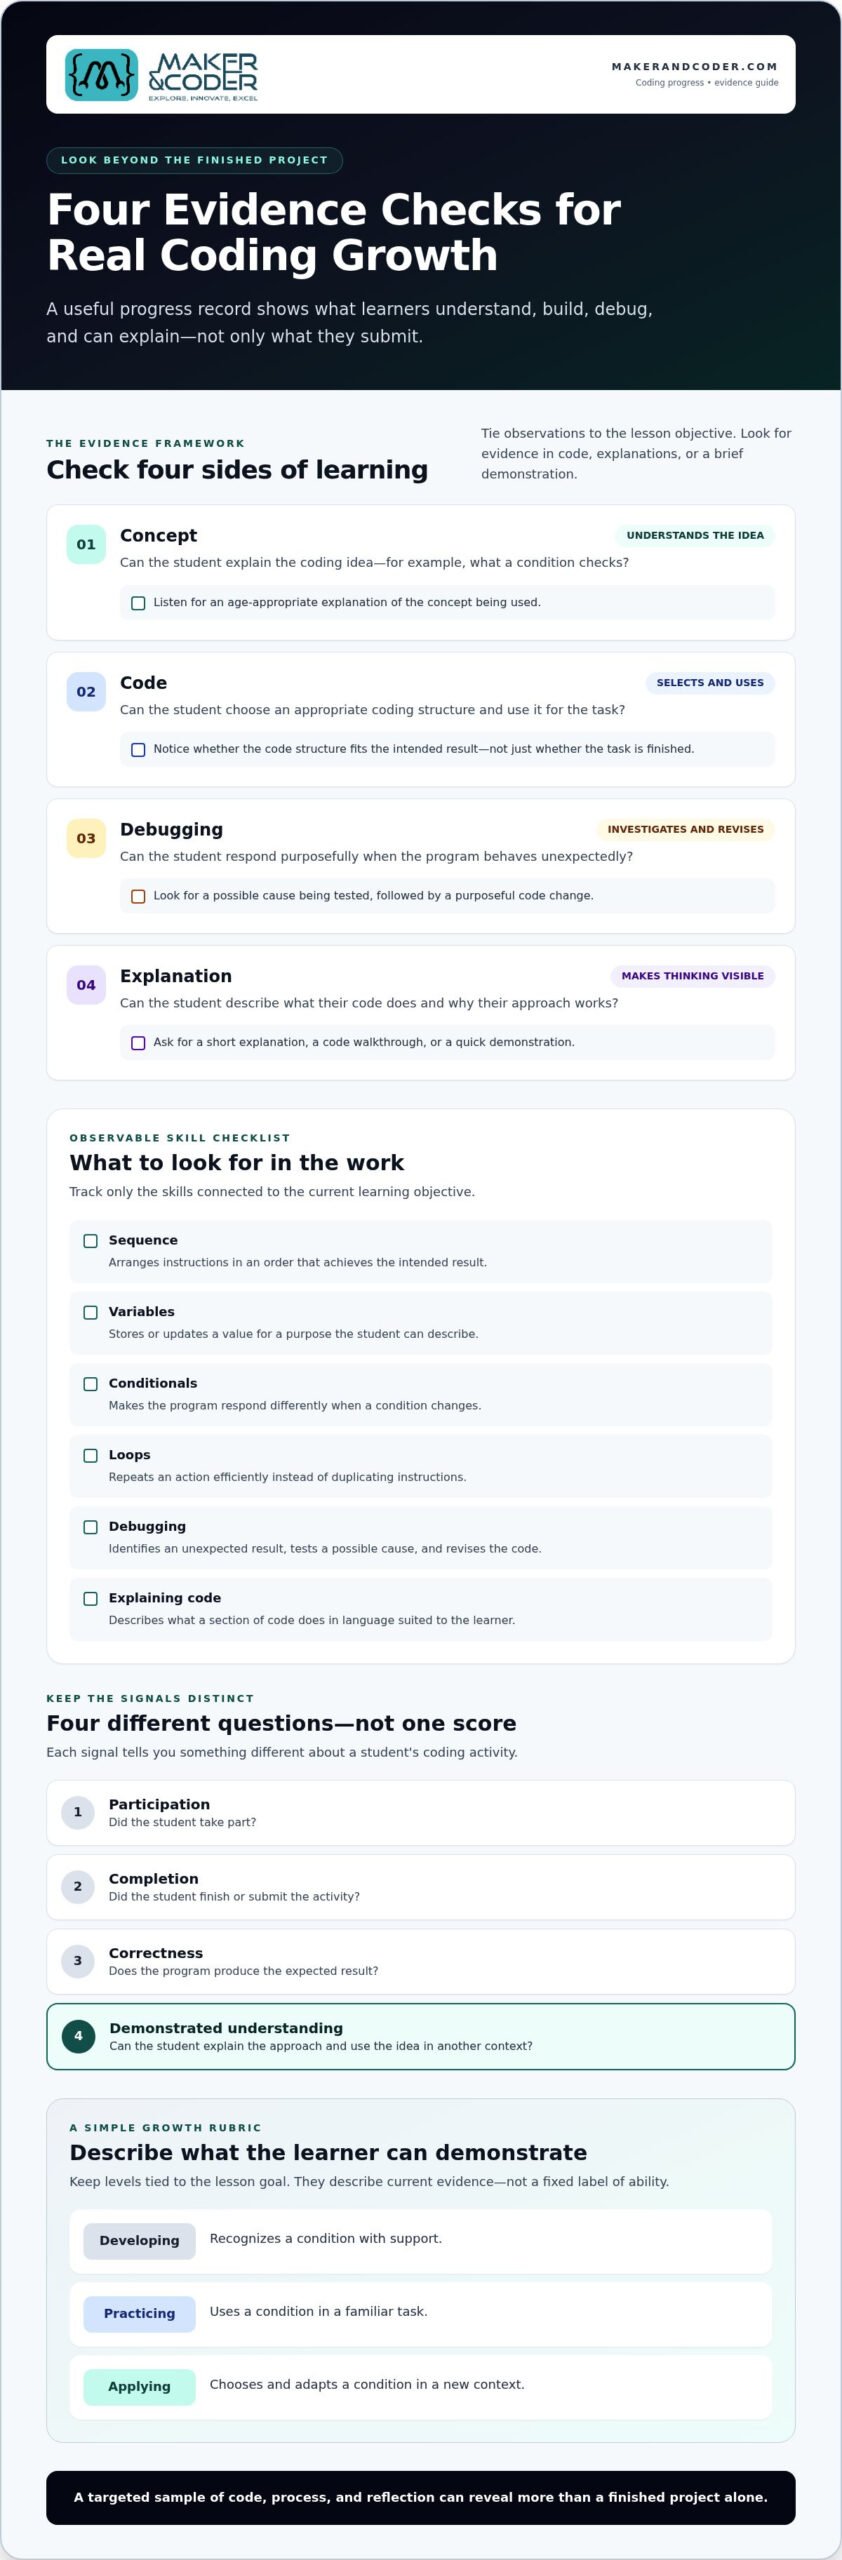
- Separate participation, task completion, correctness, and demonstrated understanding to see what coding activity actually reveals.
- Use evidence from concepts, code construction, debugging, and student explanations to build a clearer picture of growth.
- Compare dashboards, observations, rubrics, portfolios, and reflections by the evidence each captures and the questions it can answer.
- Make tracking student progress in coding manageable with a weekly cycle that samples work against a focused learning objective.
- Use structured, hands-on projects to make students’ coding decisions and developing skills easier to observe.
What Does Tracking Student Progress in Coding Really Measure?
Tracking student progress in coding means looking for observable growth in how learners understand concepts, construct code, debug problems, and apply skills independently. A useful record shows more than whether a student was present or submitted an activity. It helps you compare what they can do now with what they could do before, then identify a next step that moves their learning forward.
Meaningful coding progress combines evidence of skill with growth over time. Evidence might include a student choosing a suitable loop, explaining what a variable stores, finding why a condition fails, or adapting a solution to a new task. No single signal tells the whole story. Participation, completion, correctness, and understanding are connected, but they are not interchangeable.
Think of them as separate questions: Did the student take part? Did they finish? Does the program produce the expected result? Can they explain their approach and use the idea in another context? This distinction aligns with educational assessment principles, which include gathering evidence to support learning as well as evaluating outcomes.
Completion Is a Signal, Not a Measure of Mastery
A submitted task confirms that something was turned in. It doesn’t reveal who made each decision or whether the student can adapt the solution. Automated checks can confirm selected outcomes, such as whether a program returns an expected result, but they can’t capture every reasoning process. If an animation works, for example, ask the student to explain one block or change the animation’s behavior. Their response can show whether they understand the code or only have a finished result.
Choose Observable Coding Skills to Track
Keep the framework focused. Select a small set of skills tied to the current lesson, then decide what evidence would make each one visible. For example, observe whether a student can:
- Sequence: arrange instructions in an order that achieves the intended result.
- Use variables: store or update a value for a purpose they can describe.
- Apply conditionals: make a program respond differently when a condition changes.
- Use loops: repeat an action efficiently instead of duplicating instructions.
- Debug: identify an unexpected result, test a possible cause, and revise the code.
- Explain code: describe what a section does, using language appropriate to their age and experience.
Look for evidence in the code, the student’s explanation, or a brief demonstration. A younger learner working with visual blocks might arrange commands, predict what will happen, and adjust the sequence after testing. An older learner might trace a variable’s value or explain why a loop stops. Track only the skills connected to the learning objective. A concise set of clear observations is easier to interpret than a long checklist that blurs what progress means.
Build a Coding Progress Framework Around Clear Evidence
Start with the learning objective, then decide what evidence would show a student is moving toward it. For a lesson on conditionals, the objective might be to use a condition to change a program’s behavior. Before assigning the project, choose a few observable indicators: the student selects a relevant condition, uses it in the code, tests how it behaves, and explains the result. This keeps tracking student progress in coding focused on learning rather than collecting data for its own sake.
A compact framework can organize evidence into four categories:
- Concept: Does the student understand the idea, such as what a condition checks?
- Code: Can they select and use an appropriate coding structure?
- Debugging: Can they investigate unexpected behavior and make a purposeful change?
- Explanation: Can they describe why their approach works, in words or another age-appropriate format?
Combining evidence from concepts, code, debugging, and explanation makes coding progress more informative than any single score or finished project. Record observations against the objective, then look for patterns across activities. One project can provide a useful snapshot, but it shouldn’t become a complete judgment of a learner’s ability.
Use a Simple Rubric for Coding Growth
Keep the rubric short and tied to the lesson goal. Use plain-language levels such as developing, practicing, and applying. For a lesson on conditionals, a student at the developing level might recognize a condition with support. A student practicing might use one in a familiar task. A student applying the skill might choose and adapt a condition in a new context. The levels describe what a learner can demonstrate, not a fixed label of ability.
Make criteria visible before students begin. Clear expectations help learners check their own work and make the rubric a guide for improvement, not just a teacher scoring tool. Focus on whether a student can choose and use the concept, rather than simply name it.
Collect Evidence From Code, Process, and Reflection
Look beyond the final artifact. Pair it with a brief record of how the student worked, such as a code change, a debugging choice, or a short explanation of what they tried and why. Depending on the project, useful evidence might be a saved version, screenshot, or quick demonstration. Keep the evidence proportionate to the objective. A targeted sample can reveal more than reviewing every line of every project.
Separate automated results from teacher observations in your notes. An automated check might show that a program meets a selected condition, while your observation captures how the student arrived at the solution or responded when it failed. Label each source so the record is easier to interpret and you can see what still needs a closer look.
For a consistent classroom approach, use a shared rubric and evidence routine. Explore support for coding instruction as you develop a framework that fits your learning goals.
Compare Coding Progress Tools Without Mistaking Data for Learning
Each tracking method reveals a different part of a student’s learning. A dashboard can flag activity patterns, while a teacher’s observation may capture how a learner approaches a challenge. For effective tracking student progress in coding, match the evidence source to the instructional question. Combine sources when one view leaves important gaps.
| Evidence source | What it captures and can help answer | Likely blind spot |
|---|---|---|
| LMS or coding-platform dashboard | Submissions, incomplete tasks, attempts, or activity patterns. Which students may need a check-in? | May not reveal understanding, reasoning, or why a student paused. |
| Teacher observation | Student choices, collaboration, and responses to a problem. What strategy is the learner using? | Captures only what the teacher sees and may vary without shared criteria. |
| Rubric | Progress against stated learning criteria. Which skill is emerging or ready for a new challenge? | Can oversimplify complex work if criteria are too broad or numerous. |
| Portfolio | Selected projects and revisions across time. How has the learner’s work developed? | Needs context to explain the decisions behind each artifact. |
| Student reflection | The learner’s account of choices, difficulties, and next steps. What do they notice about their own process? | Reflection alone may not verify what the code demonstrates. |
What Dashboards Show, and What They Cannot Prove
Use dashboard signals to decide where to look more closely. Inactivity, incomplete work, or repeated attempts might prompt a supportive conversation or a review of the task. They don’t explain the cause. A learner may spend a long time experimenting, struggle with an instruction, or leave a project open while doing something else. Time-on-task and completion are context signals, not direct measures of coding competence.
Progress indicators also differ by platform and by how an activity is configured. One tool may count a level as complete after submission; another may record attempts or selected checks. Interpret each signal according to what it measures, and avoid treating dashboard data as a universal score of ability.
When Rubrics, Portfolios, and Teacher Review Add Value
Rubrics make expectations more consistent across students and project stages, especially when they describe observable actions. Portfolios show development across projects instead of relying on one isolated submission. Automated feedback can quickly identify whether selected conditions are met; teacher review adds context when creativity, debugging choices, or reasoning matter. Pairing these sources creates a fuller picture without requiring every signal to carry equal weight.
Tracking should support learning, not feel like surveillance. Collect only information tied to a teaching decision, such as who needs clarification, another practice opportunity, or a deeper challenge. Be transparent with students about what you record and how it will help guide their learning.
How to Track Student Coding Progress in a Manageable Weekly Cycle
A reliable routine doesn’t require reviewing every project in full. Set aside a focused moment each week to check a sample of student work against the current learning objective, notice patterns, and choose a response. This makes tracking student progress in coding part of instruction, not a separate grading project.
- Define the target. State one skill students are working toward, such as using a loop to repeat an action. Choose a small number of visible signs of progress, like selecting an appropriate loop and explaining what it repeats.
- Gather a sample of evidence. Review selected code, project versions, student explanations, or brief demonstrations. Sample work that helps answer the target question instead of trying to inspect every line from every learner.
- Review patterns. Look across the sample for shared strengths and sticking points. Are students choosing loops appropriately but having trouble controlling when they stop? Separate a recurring concept gap from an isolated mistake.
- Respond with a next step. Choose a mini-lesson or scaffold for students who need support, a focused practice task for students still building confidence, or an extension that invites ready learners to adapt the idea in a new context.
- Revisit the skill. In a later activity, check whether students can use the concept with less support. Record the new evidence alongside the earlier observation so the record shows a learning trajectory, not just a single result.
Progress evidence is useful when it points to a specific teaching response and a clear way to check whether that response helped. Keep a brief note of the pattern you noticed, the action you took, and what you’ll look for next. For example, if several students can build a loop but can’t explain its effect, model how to trace the repeated instructions, then check for independent explanations in a later task.
Turn Evidence Into Timely Teaching Decisions
Group recurring misconceptions by concept instead of treating every error as an individual failure. If students are mixing up a condition and an action, pause for a short demonstration or invite a peer to explain the difference. If one learner needs more structure, provide a scaffold; if another is ready, offer an extension. Record the response and revisit the skill to see whether students can apply it independently.
Share Progress With Students and Families
Make growth concrete. Share what a student can do now, a specific example of their work, and what they’ll practice next. Invite the learner to reflect on a problem-solving choice and name a meaningful next goal. With families, describe progress in clear language rather than relying on a leaderboard or a single score. For support in developing a consistent classroom routine, connect with Maker & Coder about coding education.
Use Structured Coding Projects to Make Progress Visible
A well-defined project brief gives students room to create while making their thinking easier to observe. State the goal, the coding concept to practice, and what learners will explain or demonstrate. For example, a brief might ask students to build a physical model that responds to an input. You can then assess how they plan a sequence, use a condition, test the result, and revise their approach against the learning objective.
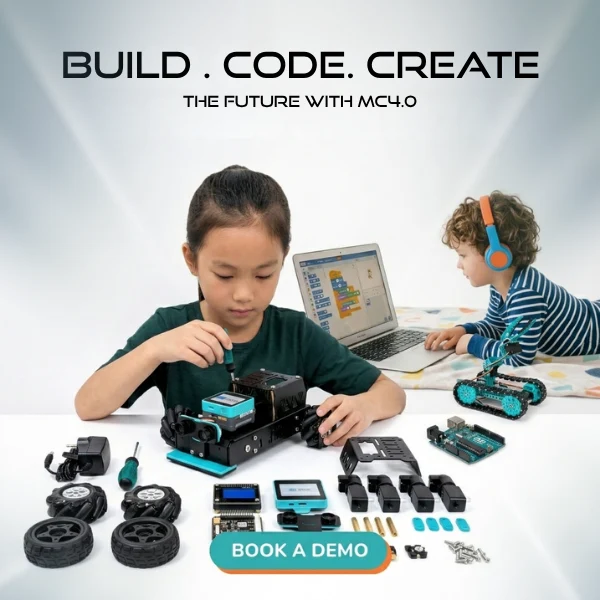
Hands-on work makes students’ decisions visible: they connect code to an outcome, test what happens, and make adjustments. Maker & Coder’s MC 4.0 hardware, MC Blocks, and K-12 MC Curriculum provide structured contexts for these learning experiences. The curriculum is designed to integrate with the hardware. The hardware itself doesn’t track or interpret progress; teachers use the same evidence framework to understand what students demonstrate through a project. MC 4.0 coding kits can give educators materials for hands-on project work.
Make Project Milestones Reveal Skill Development
Break the project into milestones so the process, not only the finished build, provides evidence. Tie each checkpoint to a specific objective, and save selected versions when they help show how an idea changed. A simple sequence can make growth visible:
- Planning: Ask students to sketch or describe the intended behavior, revealing how they interpret the brief and plan a solution.
- First build: Review an early code-and-build attempt for the target concept, such as sequencing instructions or using a variable.
- Debugging: Have students identify an unexpected result and explain what they’ll test or change.
- Revision: Compare a selected earlier version with the updated work to discuss purposeful changes.
- Explanation: Invite students to demonstrate the result and describe how their code produces it.
These checkpoints don’t need to become separate graded assignments. Capture only the evidence connected to the learning goal, then use it to discuss choices and improvement with students.
Support Consistent Classroom Implementation
A curriculum sequence can align project tasks with intended learning progression, so evidence gathered in one activity supports the next. Consistent routines also make expectations easier to explain and student work easier to review across a class. Maker & Coder’s teacher training programs support educators in implementing STEM technology and classroom learning routines effectively.
Build a classroom approach that connects hands-on projects to meaningful evidence. Discuss your coding education goals with Maker & Coder.
Turn Learning Evidence Into a Stronger Coding Culture
A progress-tracking routine can grow with your students. Begin with one learning goal, notice how learners approach it, and use what you discover to shape the next opportunity to build, test, and create. Over time, tracking student progress in coding can become more than a record of achievement. It can help students recognize their growth and take greater ownership of what they learn next.
Make the classroom routine sustainable by connecting project evidence to instruction. The K-12 MC Curriculum is designed to work alongside Maker & Coder hardware, and teacher training programs help educators put technology and learning routines into practice. Together, these resources can help turn coding activities into purposeful opportunities for students to demonstrate and develop their skills.
Ready to shape a coding learning experience around your students and classroom goals? Talk with Maker & Coder about your coding education goals.
Frequently Asked Questions
How do you track student progress in coding?
Track progress by comparing what a student can do at different points in a course, not by counting completed exercises alone. Start with a short baseline task, such as asking learners to modify a simple program, and keep a sample of their work. Later, give them a related task with a small change in the requirements. Compare how much support they need and whether they can adapt their approach.
What should teachers measure in a coding class?
Measure whether students can turn a problem into workable instructions, use the coding structures taught, test outcomes, and make reasoned revisions. Also notice how they respond to unfamiliar requirements, since that can show whether learning transfers beyond a practiced example. For projects involving AI-generated code, ask learners to identify what assistance they used and explain the parts they can evaluate or modify themselves.
Can coding progress be measured automatically?
Automated checks can assess defined conditions, such as whether code runs, a required output appears, or a test case passes. They’re useful for quick feedback, especially when students need to identify a syntax or logic issue while working. But automatic results cover only what the checks were designed to test. A passing result can’t establish that a learner understands the solution or could adapt it independently.
How often should teachers review coding progress?
Review evidence regularly enough to adjust instruction while a concept is still being taught. A weekly check can help identify class-wide patterns, while a brief look at a project checkpoint may reveal a misconception before students build further on it. You don’t need a full review after every session. Use a focused check when a new concept begins, students apply it, or the task changes in complexity.
Is time spent coding a reliable measure of student progress?
No. Time records how long a student was active in a tool, but not what they understood or accomplished. One learner may solve a challenge quickly by applying prior knowledge; another may spend longer exploring several approaches. Treat duration as a prompt for context, not a score. If a student’s time is unusual, look at their work or ask what they were trying before deciding whether support is needed.
How can teachers assess coding when there is no single correct answer?
Assess how well a solution meets the project’s requirements rather than whether it matches one model answer. Share criteria such as functionality, appropriate use of the target concept, clarity of explanation, and how the student tested the result. Then invite learners to demonstrate their approach. Two projects might look different yet both meet the goal, while their design choices give you useful evidence of individual thinking.
How can student coding progress be shared with families?
Share a specific example of learning in plain language, such as, “Your student used a condition to make the program respond to a change, and next they’ll practice testing different outcomes.” A short project sample or student explanation can make that update more meaningful than a score on its own. Invite the student to describe what they’re proud of and what they want to try next.