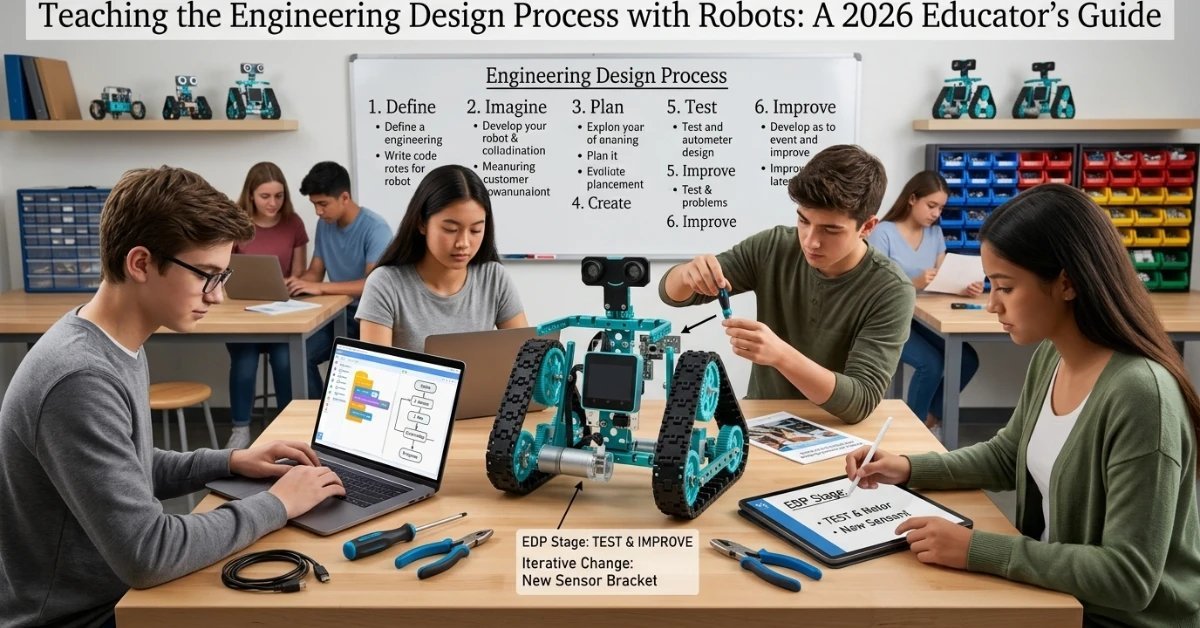
The most critical output of a STEM classroom isn’t a functional machine; it’s a resilient mind. You have likely seen the shift: excitement turns to frustration the moment a student’s first prototype fails to move. Teaching engineering design process with robots should be the ultimate vehicle for cognitive development, yet managing technical hurdles often feels like a barrier to true innovation. It is exhausting to watch students give up after one failed test or to struggle with assessing a process that feels invisible. We understand that technical confidence is built through trial, not just triumph.
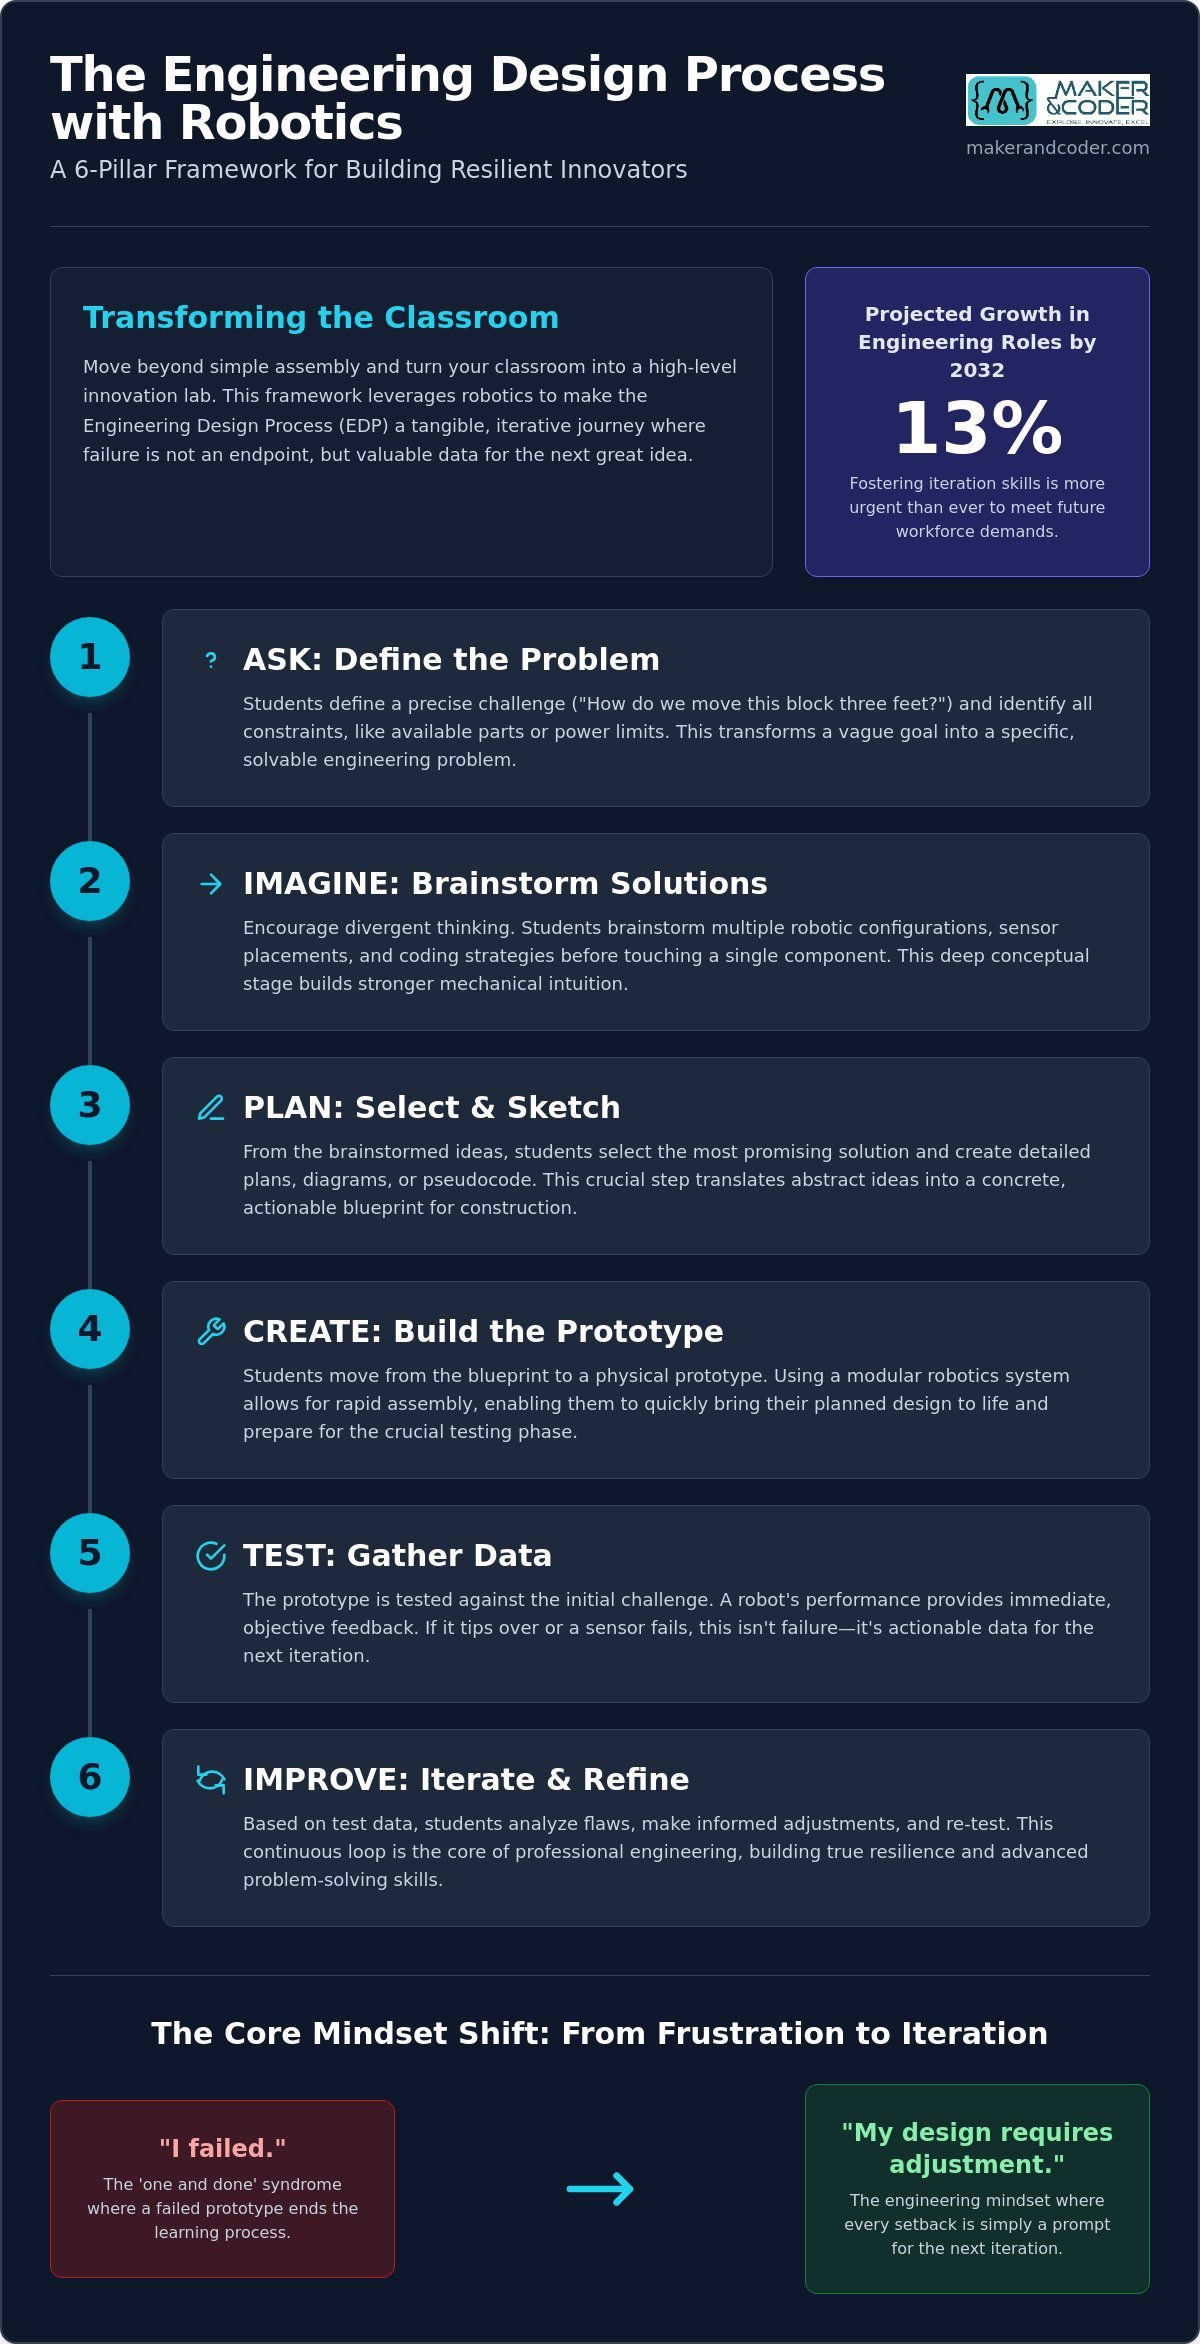
This guide will transform your classroom from a building zone into a high-level innovation lab by mastering the integration of the Engineering Design Process with modular robotics. With engineering roles projected to grow by up to 13% by 2032, the need for students who can iterate is more urgent than ever. We provide a repeatable classroom framework that empowers students to self-correct and ensures your curriculum aligns with modern 2026 STEM standards. From fragile prototypes to resilient solutions, you will learn how to foster a culture of iteration where failure is simply data. Prepare to move beyond the assembly line and lead your students toward genuine engineering mastery.
Key Takeaways
- Leverage the high-fidelity feedback of robotics to transform abstract theory into a tangible, iterative journey of discovery.
- Implement a repeatable 6-pillar framework for teaching engineering design process with robots that fosters resilience and technical confidence.
- Overcome the “one and done” syndrome by shifting the classroom focus from final products to the continuous refinement of working designs.
- Craft open-ended challenges using specific constraints to push students beyond simple assembly and toward genuine innovation.
- Utilize the MC 4.0 Kit and comprehensive MC Curriculum to provide a future-proof roadmap for modern STEM excellence.
Table of Contents
- Bridging Theory and Build: Why Robotics is the Ideal Tool for the EDP
- The 6 Pillars of the Engineering Design Process in a Robotics Classroom
- Moving Beyond "One and Done": Overcoming the Iteration Hurdle
- Designing Your First Robotics Challenge: A Practical Framework
- Empowering Future Innovators with the MC 4.0 Ecosystem
Bridging Theory and Build: Why Robotics is the Ideal Tool for the EDP
Engineering is rarely a straight line. It is a messy, looping cycle of trial, error, and discovery. While many classrooms rely on static models to demonstrate concepts, teaching engineering design process with robots offers a level of engagement that physical sketches or popsicle-stick bridges cannot match. By utilizing a modular system, students move from passive observers to active architects of their own mechanical solutions. The Engineering Design Process (EDP) functions as a non-linear map, guiding learners as they define problems, prototype, and refine their ideas. In this environment, the robot acts as a high-fidelity mirror of a student’s logic, providing a sandbox where they can transition from being consumers of technology to creators of solutions.
The Feedback Loop: Why Robots Don’t Lie
Traditional STEM activities often suffer from the “one and done” syndrome. If a static model fails, the lesson frequently ends in a pile of materials. Robotics changes this dynamic entirely. A robot provides immediate, objective feedback rooted in the laws of physics and the precision of code. If the logic is flawed, the machine remains still. If the center of gravity is miscalculated, it tips. This creates a relentless but fair feedback loop where failure is transformed into actionable data. When teaching engineering design process with robots, educators can shift the student’s mindset from “I failed” to “My design requires adjustment.” This pivot is the cornerstone of professional engineering, teaching students that every setback is simply a prompt for the next iteration.
- Objective Reality: Code either executes or it doesn’t, removing subjective grading from the initial testing phase.
- Data-Driven Iteration: Students analyze sensor logs and physical performance to make informed design changes.
- Resilience Building: The ease of rebuilding modular robots encourages students to take risks without the fear of wasting expensive materials.
Aligning Robotics with 21st Century Skills
Modern education must bridge the gap between basic literacy and future-readiness. Integrating the EDP into robotics projects prepares students for a world dominated by AI and the Internet of Things (IoT). They learn to collaborate on complex systems, communicating through both language and technical logic. Using advanced hardware like the MC4.0 Controller allows students to orchestrate sophisticated inputs and outputs, mirroring the technology they will encounter in the workforce. This approach ensures they don’t just follow instructions; they learn to command complex systems. By mastering these tools, students develop the critical thinking and problem-solving skills necessary to lead the next generation of technological innovation.
The 6 Pillars of the Engineering Design Process in a Robotics Classroom
Successful implementation of STEM education requires more than just high-quality hardware; it demands a structured methodology. When teaching engineering design process with robots, we move through six distinct pillars that turn a chaotic build into a disciplined innovation cycle. This sequence ensures that students don’t just play with parts but instead follow a professional path from problem identification to technical refinement. By following this roadmap, educators can transform a simple classroom activity into a rigorous engineering exercise.
Ask and Imagine: Setting the Stage for Innovation
The process begins with the Ask phase. Here, students must define the problem with absolute precision. Rather than a vague goal, the challenge should be specific: “How do we move this block three feet without human contact?” This forces students to identify constraints, such as available power or part limits. In the Imagine phase, we encourage divergent thinking. Students brainstorm multiple robotic configurations and sensor placements before touching a single component. Utilizing research-backed insights from 2024 academic studies, it’s clear that students who engage deeply in this conceptual stage develop more sophisticated mechanical intuition and better long-term problem-solving skills.
Plan and Create: From Sketch to Prototype
Moving into the Plan phase, students select their strongest concept and begin sketching the assembly using MC Blocks. This stage is vital for visualizing the logic through pseudo-coding and basic wiring diagrams. The Create phase follows, where the initial build comes to life using the MC 4.0 Kit. We recommend setting a Minimum Viable Robot (MVR) goal for this first build. An MVR is the simplest version of the machine that can attempt the task. It prevents students from becoming overwhelmed by aesthetics before they have proven their core mechanical theories actually work in the physical world.
The final pillars, Test and Improve, are where the most profound learning occurs. Students run their code and observe the robot’s physical response. Does it veer off course? Does the motor stall under load? This data drives the Improve phase, which is the critical pivot of the entire cycle. Students modify their hardware or software based on objective performance data rather than guesswork. If you want to see how these pillars can be integrated into your specific grade level, you can connect with our educational specialists to explore customized implementation strategies. This structured approach to teaching engineering design process with robots ensures that every failure is simply a stepping stone toward a more optimized solution.
Moving Beyond “One and Done”: Overcoming the Iteration Hurdle
The most common barrier in a STEM classroom isn’t a lack of parts; it’s the “One and Done” syndrome. Many students believe that once their robot completes a task a single time, the mission is over. This mindset treats engineering like a checklist rather than a cycle of excellence. When teaching engineering design process with robots, the real breakthrough happens when students learn to treat their first success as a baseline for improvement. Iteration is the process of refining a design through repeated testing and modification. By shifting the definition of success from “it worked” to “how can we make it better,” you prepare learners for the relentless demands of modern innovation.
Modularity plays a decisive role in this transition. If a student builds a robot using permanent adhesives or complex, non-reusable fasteners, they become emotionally and physically attached to their first attempt. They resist changes because the cost of rebuilding is too high. Modular systems like MC Blocks eliminate this friction. They allow students to swap a sensor or adjust a gear ratio in seconds, making the physical act of iteration as fast as the thought process behind it. This speed encourages students to take risks, knowing they can revert or pivot without starting from scratch.
The Iteration Framework: Compare and Contrast
Helping students distinguish between simple building and true engineering requires clear boundaries. This shift mirrors a sophisticated pedagogical approach for engineering design that emphasizes the transition from basic assembly to complex system analysis. We recommend using Design Journals to document every “failed” test as a valuable data point. The MC Curriculum (K-12) provides structured templates for these journals, ensuring that students track their variables and outcomes systematically.
- Building: Goal is a single success. Linear path. Ends at the first working prototype.
- Engineering: Goal is optimization and reliability. Cyclic path. Centers on the “Improve” phase.
Managing Frustration in the Classroom
Iteration can be taxing. To keep momentum high, you must normalize failure as a professional milestone. Facilitating peer review sessions allows students to critique each other’s designs, providing fresh perspectives that a frustrated builder might miss. We also suggest implementing the “Three Before Me” rule: students must consult their Design Journal, their teammate, and a peer group before asking the teacher for help. This fosters independence and reinforces the idea that troubleshooting is a core engineering skill. By mastering these classroom management techniques, teaching engineering design process with robots becomes a journey of empowered discovery rather than a series of technical roadblocks.
Designing Your First Robotics Challenge: A Practical Framework
The success of your STEM program hinges on the quality of the problems you ask students to solve. If you provide a step-by-step assembly guide, you aren’t teaching engineering; you’re teaching following instructions. To truly master teaching engineering design process with robots, you must craft open-ended challenges that lack a single “correct” answer. Start by defining a clear objective, such as “transporting a hazardous material across a simulated disaster zone,” and then step back. This shift forces students to rely on their own mechanical intuition rather than a pre-determined blueprint.
Constraints are the secret ingredient of innovation. By limiting resources, you push students to think more deeply about every component they use. Consider these specific parameters for your next challenge:
- Part Limits: Restrict the build to only two MC Blocks or a specific number of fasteners to encourage structural efficiency.
- Energy Consumption: Challenge students to complete the task using the least amount of battery power, introducing them to sustainable design.
- Time Scarcity: Set strict deadlines for the “Imagine” and “Test” phases to mirror the pressure of real-world engineering firms.
Organize your classroom into “Design Firms” or “Engineering Squads” to simulate professional environments. This structure clarifies roles, such as Lead Programmer or Structural Engineer, and builds collaborative accountability. When it comes to assessment, stop grading the final score alone. Instead, evaluate the quality of their documentation and the depth of their “Improve” phase. A team that fails the task but documents three distinct, data-driven iterations has demonstrated more engineering mastery than a team that succeeded by accident on their first try.
The AIoT Edge: Modernizing the Challenge
Prepare your students for the 2026 technological landscape by integrating environmental sensors into the EDP. Using the MC4.0 AIoT Kit, you can design “Smart City” challenges where robots must respond to real-time data like light levels, temperature, or humidity. This moves the curriculum from local, isolated control to cloud-integrated solutions. Students learn to build systems that don’t just move, but perceive and react to the world around them, bridging the gap between basic robotics and advanced artificial intelligence.
Logistics and Classroom Flow
Effective management transforms a chaotic building zone into a purposeful laboratory. We recommend allocating 30% of your class time to the initial build and 70% to testing and iteration. This “30/70 Rule” ensures students have the breathing room to fail and refine their designs. Establish a dedicated “Testing Zone” where prototypes can be safely run without interrupting those in the “Design Zone.” To keep hardware organized, use standardized storage for “work-in-progress” builds, ensuring that the MC 4.0 Kit components remain accessible for the next firm. If you are ready to bring this structured framework to your school, contact our team for a curriculum consultation to see how we can support your lab’s specific needs.
Empowering Future Innovators with the MC 4.0 Ecosystem
Mastering the art of teaching engineering design process with robots requires more than a box of parts; it demands a cohesive ecosystem designed for growth. The MC 4.0 Kit serves as the definitive hardware foundation for this journey, providing the precision and reliability needed for high-stakes iteration. While other platforms offer isolated tools, we provide a unified architecture where the MC Curriculum (K-12) acts as your strategic roadmap. This curriculum ensures that every lesson plan, build, and assessment aligns with rigorous academic standards, giving you the clarity to lead your students from basic curiosity to advanced mechanical mastery.
Technical confidence is the bridge between a daunting challenge and a creative breakthrough. We recognize that for many educators, managing complex hardware can feel overwhelming. This is why our Teacher Training Programs are essential. These sessions don’t just teach you how to assemble parts; they empower you to facilitate the entire Engineering Design Process with authority. By lowering the technical barrier to entry with modular MC Blocks, even primary school educators can introduce sophisticated concepts without the friction of traditional assembly. It’s about providing peace of mind to those responsible for the next generation’s development.
Scalability Across Grade Levels
The beauty of this system lies in its ability to scale. Students might begin in primary school with simple mechanical builds that focus on structural integrity. As they progress, the MC4.0 Controller evolves with them, supporting more complex logic and eventual AIoT integration in high school. This consistency is vital when teaching engineering design process with robots across multiple grade levels, as it builds a cumulative foundation of knowledge rather than isolated experiences. This continuity creates a consistent “Engineering Language” across an entire school district. It ensures that students don’t waste time relearning new systems each year, allowing them to focus entirely on solving the challenges at hand.
Join the Maker & Coder Community
You aren’t just buying a kit; you’re joining a global movement of forward-thinking pioneers. Our community provides ongoing professional development and a platform to share classroom success stories or custom EDP challenges. It’s a space where the “expert-as-enabler” philosophy comes to life, connecting you with other mentors dedicated to student success. Whether you are troubleshooting a new sensor configuration or designing a district-wide competition, you have a trusted partner every step of the way. We provide the tools, the training, and the community support to move your classroom from a building zone to a true center of innovation.
Explore our full range of STEM kits and curricula to start your EDP journey today.
Lead the Next Generation of Professional Innovators
The transition from a simple building zone to a high-level innovation lab is defined by how you handle failure. By implementing the 6-pillar framework and prioritizing the “Improve” phase, you shift the classroom focus from a single successful test to a culture of continuous refinement. Teaching engineering design process with robots provides students with the immediate, objective feedback they need to develop technical resilience. You’ve seen the roadmap; now it’s time to deploy the foundation for your students’ future careers.
Our ecosystem is used by innovative educators worldwide to deliver a comprehensive K-12 MC Curriculum that scales across every grade level. With professional Teacher Training available to build your technical confidence, you don’t have to navigate this technological landscape alone. It’s time to move beyond assembly and start engineering genuine solutions that prepare your learners for the 2026 workforce and beyond.
Equip your classroom with the MC 4.0 STEM Ecosystem today and start your journey toward STEM excellence. The future belongs to those who can build, test, and iterate. We can’t wait to see what your students create.
Frequently Asked Questions
What is the most important part of the engineering design process for students?
The iteration phase is the most critical element when teaching engineering design process with robots. This stage is where students analyze data from failure and pivot their designs. It transforms a simple building activity into a rigorous cognitive exercise that builds resilience and technical intuition. By focusing on refinement, students learn that engineering is a cycle of excellence rather than a linear path to a single correct answer.
How do I assess the engineering design process if the robot doesn’t work?
Assess the documentation and the quality of the iterations rather than the final physical outcome. A student who documents three distinct, data-driven modifications in their Design Journal has successfully applied the EDP; even if the final prototype fails to complete the task. This approach shifts the grade toward the “process” and rewards students for demonstrating the critical thinking skills required to troubleshoot complex mechanical systems.
Which robotics kit is best for teaching the engineering design process?
The MC 4.0 Kit is the ideal hardware foundation because its modular nature allows for rapid prototyping and iteration. Unlike fixed systems that require tedious disassembly, MC Blocks enable students to swap sensors or adjust mechanical structures in seconds. This speed is essential for the “Improve” phase of the cycle; ensuring that students spend their time thinking and testing rather than struggling with difficult fasteners.
Can I teach the EDP to primary school students using robots?
You can effectively introduce the EDP to primary learners by focusing on simple mechanical builds and basic logic. Using modular systems like MC Blocks reduces technical friction; allowing younger students to focus on the “Ask” and “Imagine” phases without becoming overwhelmed by complex assembly. It’s an empowering way to start teaching engineering design process with robots at an age where curiosity is at its peak.
How much time should I allocate for a robotics-based EDP project?
Allocate at least 70% of your project time to the testing and iteration phases. A common mistake is spending too long on the initial build, which leaves students with no room to learn from their inevitable failures. A balanced project typically requires three to five class sessions. This duration provides enough breathing room for students to move through multiple design cycles and reach a truly optimized solution.
What are common mistakes teachers make when using robots to teach engineering?
The most frequent error is providing overly prescriptive instructions that leave no room for original design. Educators should act as facilitators who provide constraints and objectives rather than step-by-step assembly guides. When you remove the “correct” blueprint, you force students to rely on the EDP to find their own way. This shift is what turns a classroom from a building zone into a true innovation lab.
How do robots help with the “Improve” phase of the design process?
Robots provide immediate, objective feedback that is rooted in physics and logic. Unlike a static bridge model, a robot’s performance generates clear, undeniable data points. If the code is flawed or the build is unstable, the robot simply won’t function. This objective reality forces students to iterate based on actual performance data rather than subjective opinions or guesswork; making the “Improve” phase deeply meaningful.
Do I need to be an engineer to teach the engineering design process?
You don’t need a background in professional engineering to lead a successful robotics lab. Comprehensive resources like the MC Curriculum (K-12) and Teacher Training Programs provide the pedagogical roadmap and technical confidence required to guide students through complex problem-solving cycles. These tools act as a bridge; helping you transition from a traditional educator to a visionary mentor who enables student-led discovery and technical growth.