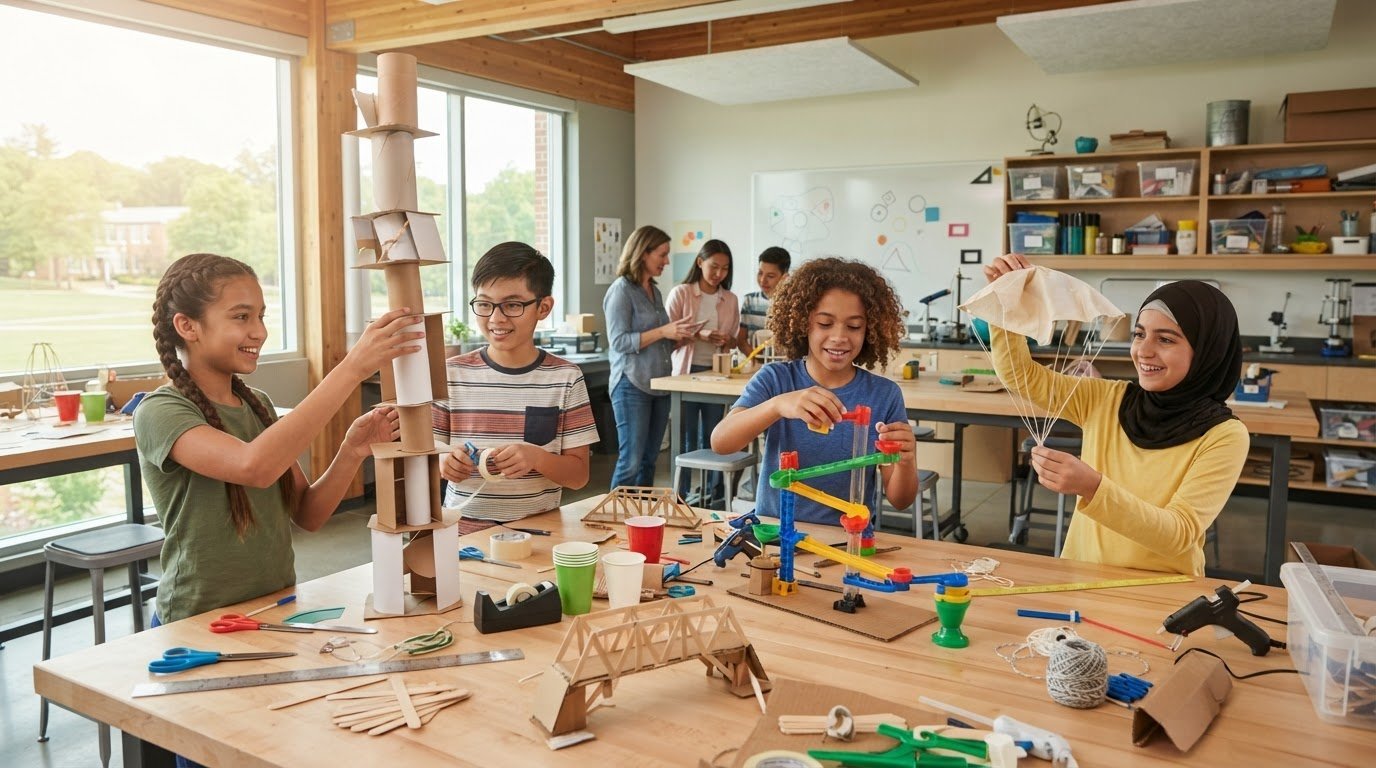
What if the final days of school became a showcase for ideas learners can build, test, and improve? The right end of year STEM project ideas can channel end-of-year energy into purposeful challenges without requiring expensive equipment or identical instructions for every group.
It can be difficult to hold learners’ attention as the year winds down. Teachers also need activities with clear goals, manageable materials, and room for different approaches. A focused design challenge gives teams a shared problem to solve, then lets them make choices, learn from setbacks, and shape their own solutions.
Explore adaptable projects that take learners from a first sketch to a prototype they can test and refine. Challenges such as paper towers, marble runs, and parachute drops work with familiar classroom materials. Each idea puts collaboration and the engineering process at the center, so learners finish the year with something they’ve made and a clearer sense of how testing can strengthen an idea.
Key Takeaways
- Choose challenges with a clear problem to solve, active making, and room to improve, so end-of-year learning feels purposeful.
- Use end of year STEM project ideas as flexible starting points, adapting materials and challenge difficulty to your classroom.
- Guide learners through a simple cycle of questioning, predicting, testing, recording, and revising so each attempt becomes a chance to learn.
- Make collaboration visible by giving teams shared decisions to make and opportunities to explain how their designs developed.
- Decide whether a one-off build or a longer learning pathway best fits your goals, then consider how coding and electronics can extend the experience.
Why end-of-year STEM projects work, and how to choose the right challenge
As the school year winds down, learners may have less patience for routine worksheets or activities that feel like busywork. A purposeful STEM challenge gives their energy somewhere to go: toward a question they care about, a design they can shape, and a result they can test. The strongest end of year STEM project ideas aren’t defined by elaborate equipment. They give learners meaningful decisions to make.
Look for three essentials: a clear problem, active making, and room to revise. If a first attempt doesn’t work, treat the result as evidence learners can use to improve their next design. This approach works in classrooms, clubs, libraries, and home learning. Adjust the scale, materials, and support to suit the setting.
What makes a project genuinely STEM?
A strong STEM challenge connects disciplines through a shared problem. Learners might use science to consider how materials behave, technology to record observations or control a device, engineering to design a solution, and mathematics to measure results or compare options. Not every activity needs all four areas in equal depth. The connection should be useful, not forced.
For instance, a challenge to protect a paper structure from a fan can prompt learners to ask what makes it stable, sketch and build a design, test it, and use their observations to decide what to change. That’s different from following fixed instructions to make identical crafts. An open-ended challenge has a clear goal but allows multiple designs and ways to reach it.
Choose a challenge for your time, materials, and learners
Start with the conditions you have, not an idealized project plan. Check the time available, the everyday materials on hand, how learners will work together, and the learning goal. A short session may suit a quick prototype and one test. A longer block can include redesign, repeat testing, and a brief explanation of the evidence behind each decision.
Use this checklist before settling on an activity:
- Time: Can learners plan, build, and test within the available sessions?
- Materials: Can you use classroom supplies or recyclables already at hand? Treat suggested materials as starting points, not a required shopping list.
- Group size: Will each learner have a meaningful way to contribute?
- Learning goal: Which skills or ideas should the challenge make visible?
Keep success criteria flexible. Reward clear reasoning, useful teamwork, careful observation, and thoughtful iteration, not just a polished final object. Offer accessible roles such as sketching, measuring, building, recording results, or explaining the design. Learners can rotate roles or choose tasks that fit their strengths while staying part of the shared problem-solving process.
A well-chosen challenge balances structure with choice. Set the problem and any essential boundaries, then let learners decide how to respond. That balance makes the work manageable for educators and more engaging for learners.
Quick-build STEM project ideas using simple classroom materials
A short build can still create rich design decisions. These end of year STEM project ideas use familiar supplies and a clear constraint, such as height, stability, or travel distance, to help learners move from a first attempt to a more considered design. The materials below are suggestions, not a mandatory shopping list. Use suitable items already available while keeping the challenge and test consistent.
Paper tower: build for height and stability
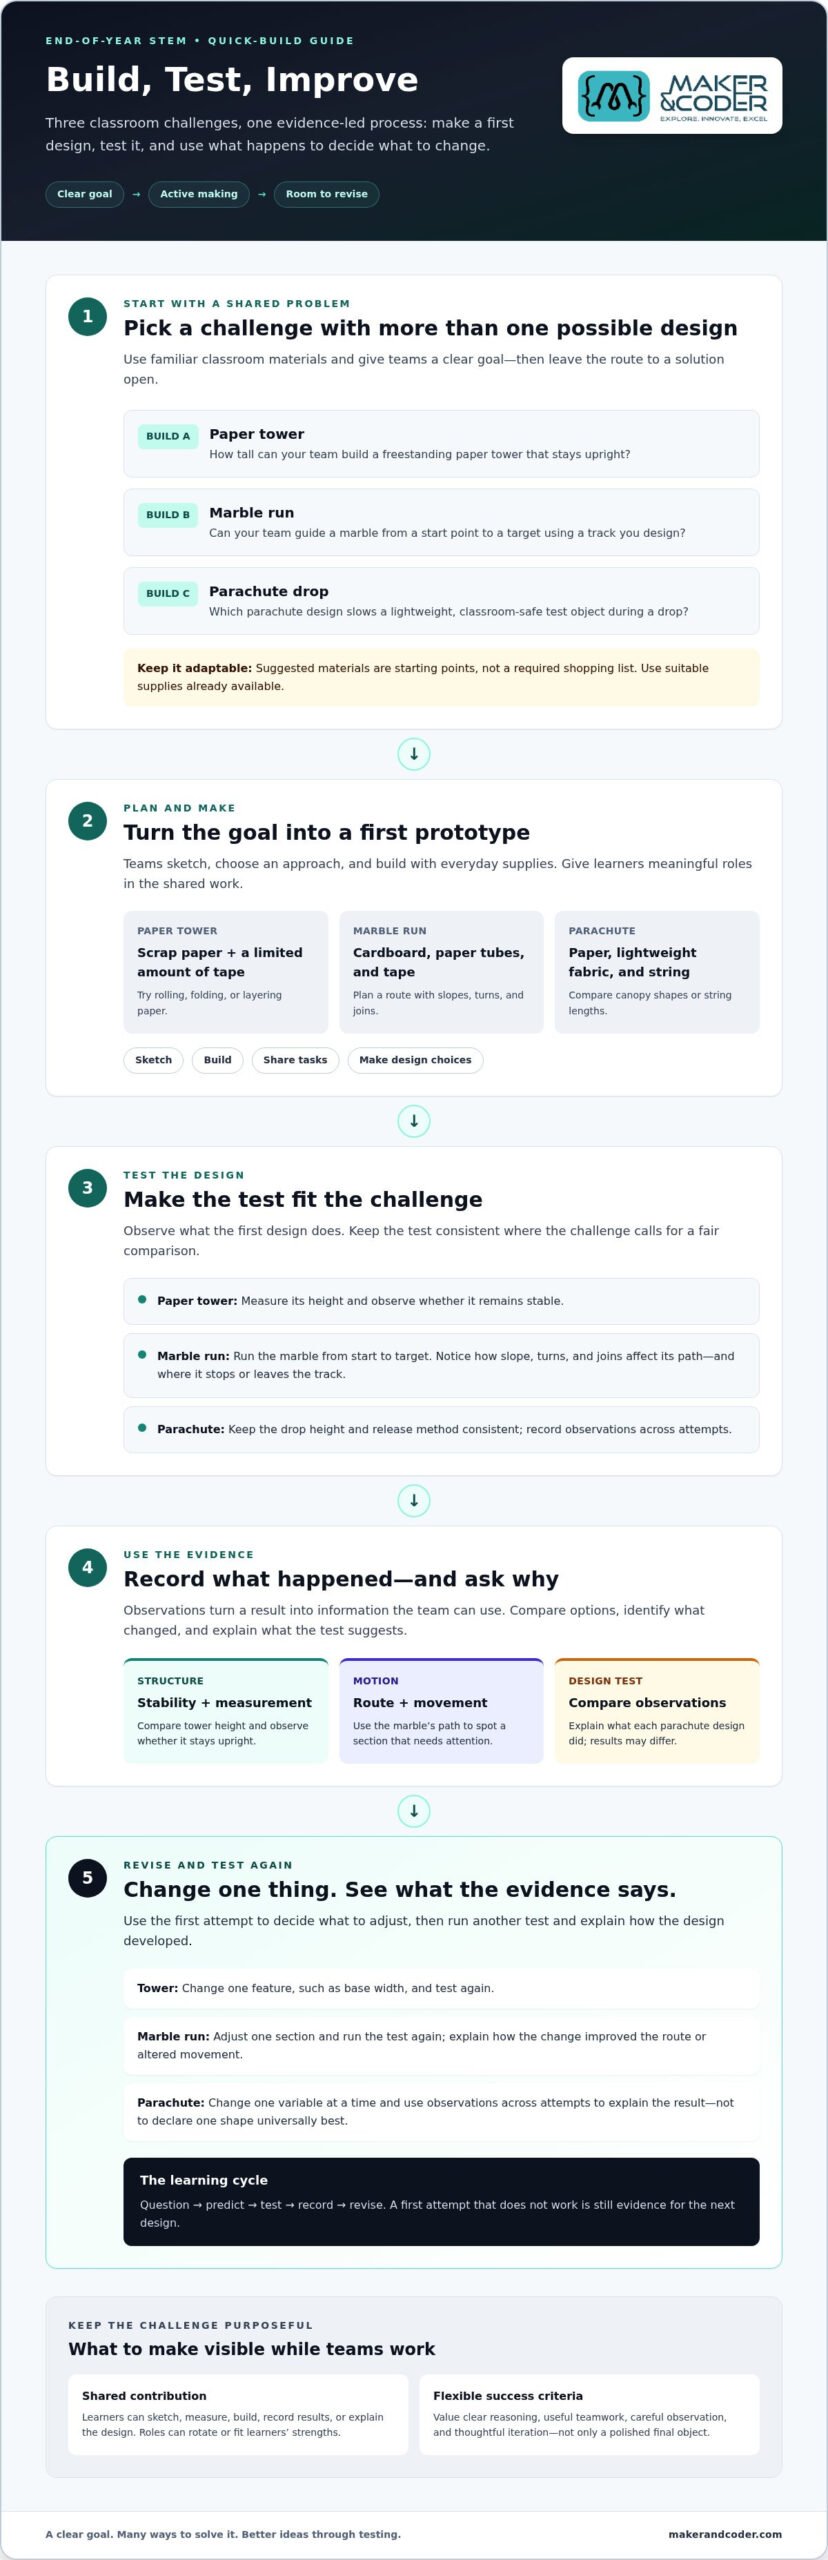
Challenge: How tall can your team build a freestanding paper tower that stays upright? Start with scrap paper and a limited amount of tape. Teams can roll, fold, or layer the paper, then compare wide bases with narrower supports and different structural shapes. Measure each tower’s height and observe whether it remains stable. Ask teams to change one feature, such as the base width, and test again.
Marble run or cardboard track: guide a moving object
Challenge: Can your team guide a marble from a start point to a target using a track you design? Try cardboard, paper tubes, and tape as starting materials. Test how slope, turns, and joins affect the marble’s path. If it stops or leaves the track, have learners identify where and suggest why. Then adjust one section and run the test again, explaining how the change improved the route or altered its movement.
Parachute drop: slow a safe test object
Challenge: Which parachute design slows a lightweight, classroom-safe test object during a drop? Paper, lightweight fabric, string, and other classroom-safe materials can provide a starting point. Compare canopy shapes or string lengths, changing one variable at a time. Keep the drop height and release method consistent, and record observations across attempts. Results may differ; the goal is to use evidence to explain what each design did, not to declare one shape universally best.
Use this quick comparison to match a build to the session and learning goal:
| Challenge | Setup effort | Teamwork opportunity | Possible learning focus |
|---|---|---|---|
| Paper tower | Low | Share building and measuring tasks | Stability, structure, measurement |
| Marble run | Low to moderate | Plan a route and troubleshoot joins | Slope, motion, spatial reasoning |
| Parachute drop | Low | Coordinate fair tests and record results | Air resistance, variables, evidence |
To keep any of these builds manageable, set a clear constraint before materials are distributed. Limit the available paper, define a target area, or ask teams to prioritize stable movement over speed. Assess the reasoning behind design choices as well as the result. If you’re shaping a broader classroom STEM plan, discuss your learning goals with Maker & Coder.
End-of-year STEM challenges that turn testing into discovery
A prototype becomes more than a build when learners can ask whether it works, gather evidence, and decide what to change. Use the same short cycle for these end of year STEM project ideas, whether the investigation takes one session or several. A repeatable process gives learners a clear path from curiosity to evidence-based improvement.
The engineering design process is a cycle of defining a problem, creating and testing a solution, and using evidence to improve it.
- Question: State one specific problem the team wants to investigate.
- Prediction: Ask learners to predict what will happen and explain their reasoning before they test.
- Test: Agree on a consistent method. Where practical, change one factor at a time so the team can see its effect.
- Record: Note outcomes and observations, including attempts that don’t work as expected.
- Revise: Use the evidence to adjust the design or plan another test.
Repeated trials can reveal a pattern, but they don’t guarantee identical results. Differences in release, measurement, or the testing environment may affect an outcome. Invite learners to identify these limits rather than treating a single result as proof.
Bottle-flip investigation: compare variables fairly
Ask each group to investigate whether bottle shape or fill level affects the chance of a successful landing. Choose one variable to change, keep the others as consistent as possible, and have teams state a prediction first. Define what counts as a successful landing, then record outcomes across repeated attempts. Compare results between trials and groups. Discuss limitations, such as differences in flipping force, and consider how a more consistent release might improve the test.
Paper-plane challenge: investigate flight distance
Have learners select one design feature, such as wing shape, and predict how it might affect flight distance. Mark a launch line and use the same measuring method for each flight. Keep the thrower and launch approach as consistent as practical; record each result rather than only the longest flight. Teams can compare their observations, refine the chosen feature, and test again. One flight won’t settle the question, since small changes in launch force or direction can affect the result.
Kite design: connect structure with flight
Challenge teams to design a kite that can fly under suitable outdoor conditions. They can consider shape, tail, and lightweight construction, then explain how each choice might support flight. If the weather has no wind or isn’t suitable for outdoor testing, have learners build and test a small design model indoors. They can compare construction choices and discuss what the indoor test can show and what would still need to be observed outdoors.
Across all three investigations, keep the record sheet simple: prediction, variable changed, observations, and next design decision. This helps learners distinguish what they saw from what they think caused it, turning a fun challenge into a careful investigation.
Collaborative STEM project ideas for teams to design, build, and share
Make teamwork part of the design challenge, not an afterthought. These end of year STEM project ideas invite teams to agree on a goal, make decisions together, and explain how feedback or testing shaped their work. The finished model matters, but so does the thinking learners can show along the way.
Offer flexible roles, then rotate them as the project moves from planning to building and testing. A learner who sketches first might become the tester next, while another records feedback or explains the design. Roles support participation without locking anyone into one task.
Cardboard arcade game: design for a player
Challenge teams to create a simple game from reusable classroom materials such as cardboard, paper, and safe construction supplies. First, define the player’s goal and how a turn works. Then invite another team to try the game without a lengthy explanation. Can players understand what to do? Is the challenge usable and fair? Gather feedback and choose one revision, such as changing a target or clarifying a rule.
Mini amusement-park structure: plan a ride or moving feature
Teams can build a manageable model inspired by a Ferris wheel or roller coaster. Ask them to sketch the structure, make a prototype, and explain how its moving feature works. Keep the demonstration small, supervised, and suited to the materials available. A model that moves slowly or only partway still gives learners something to inspect, describe, and improve.
Design a future-friendly classroom or community space
Set a specific user need, such as making a shared reading corner easier to use or planning a welcoming community gathering area. Teams can create a model or annotated design, considering layout, accessibility, materials, and how people will move through or use the space. Ask them to identify feedback or observations that influenced one design decision.
Use this comparison to select a format that fits your goal and available supplies:
| Project format | Construction focus | Possible materials | Presentation format |
|---|---|---|---|
| Cardboard arcade game | Rules, targets, and player experience | Cardboard, paper, reusable materials | Demonstrate the game and share player feedback |
| Amusement-park model | Structure and a small moving feature | Cardboard and classroom construction supplies | Show the model and explain its movement |
| Classroom or community space | Layout shaped by a user need | Model-making or drawing materials | Present an annotated plan and design reasoning |
Close with a short team presentation: name one design choice, describe one test result or piece of feedback, and identify one planned improvement. This makes decision-making visible, even if teams created very different solutions. To shape a collaborative project around your classroom goals, talk with Maker & Coder about STEM learning.
Turn one end-of-year STEM project into a lasting learning pathway
A one-off challenge can be the right choice when the goal is to spark curiosity, practise a design skill, or finish the school year with a shared project. Choose a longer sequence when learners need time to build foundational knowledge, revisit ideas, or develop a project across several stages. Start with the learning goal, then decide how much time and structure learners need to reach it.
A simple progression can turn one build into a wider investigation: first design a solution, then consider how coding might control an action, and later explore what it could sense or communicate. Keep each extension appropriate to learners’ readiness and the tools available. The aim is to deepen the questions, not to promise a particular technical outcome.
Extend a build with coding and connected-technology questions
Invite learners to imagine how a design could respond to information or share it. What might it sense? What could it control? What information might it communicate? These questions can lead from physical design into age-appropriate exploration of coding, electronics, and connected technology. Hardware-supported STEM learning kits can provide a structured way to explore technical concepts alongside practical making.
Connect classroom projects with structured K-12 learning
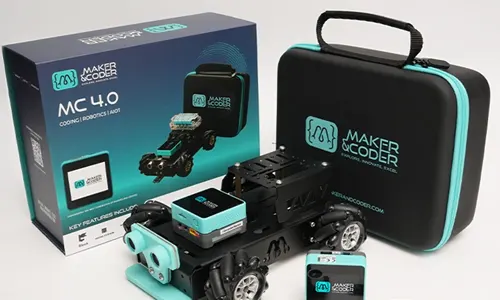
For educators looking to extend project-based learning, Maker & Coder’s ecosystem includes the MC 4.0 Controller and modular MC Blocks, alongside the MC4.0 Base Kit, MC4.0 AIoT Kit, and MC4.0 STEAM Kit. The K-12 MC Curriculum is designed to integrate with the hardware, connecting hands-on activity with a structured learning pathway. Educators can build from a standalone challenge toward a sequence of related technical learning.
Help educators move from an idea to classroom implementation
A longer pathway also asks educators to plan how technology will support learning goals and classroom activity. Maker & Coder’s teacher training programs support educators implementing STEM technology, helping them connect practical classroom use with instructional aims. Before extending a project into a larger sequence, consider what learners should understand, what they’ll create, and how you’ll guide reflection.
Whether you’re shaping a single activity or planning connected learning across the year, start with the learners and the outcomes you want to support. Talk with Maker & Coder about your STEM learning goals and classroom implementation needs.
Carry One More Question Into the Next Term
Let the project end with a question worth carrying forward. Which design decision would learners revisit with more time? What might they want to measure, automate, or understand more deeply? Capturing these questions in a class reflection creates a practical starting point for future planning without requiring you to map out an entire sequence before the first build begins.
Choose one next step that fits your setting: refine the challenge, add a layer of technical exploration, or invite learners to apply their thinking to a different problem. The most useful end of year STEM project ideas don’t have to end with a finished model. They can spark another cycle of curiosity, experimentation, and making.
To connect hands-on projects with longer-term classroom learning goals, share your STEM learning goals with Maker & Coder. Start with one question and see where learners take it.
Frequently Asked Questions
What are good end-of-year STEM projects for elementary students?
Good elementary projects have a concrete goal and let children make choices about how to reach it. A paper bridge challenge, for example, can ask learners to span a gap and hold a small classroom object, with teams choosing how to shape or reinforce the bridge. These end of year STEM project ideas can be simplified with picture prompts or extended by asking learners to compare designs and explain why one held more weight.
How do you keep students engaged in STEM activities at the end of the year?
Give learners a choice that matters, such as selecting a user, setting, or design feature for their challenge. A short “client brief” can make the task feel purposeful: teams might design a quiet signal system for a busy classroom, then invite classmates to try it. Keep instructions easy to revisit and build in a gallery walk or peer feedback moment, so students see how their ideas connect to an audience.
Can end-of-year STEM projects be completed in one class period?
Yes, a compact project can fit one period if the goal is narrow and supplies are ready before learners begin. Choose one design decision to explore rather than asking teams to build a complete, polished solution. A quick sketch, prototype, test, and exit reflection can provide a satisfying arc. If learners need to compare several versions, gather user feedback, or prepare a presentation, continue the work in another session.
What materials do you need for classroom STEM projects?
Start with what the challenge requires, then use familiar supplies such as paper, cardboard, tape, string, and clean reusable containers. For a water-filter investigation, agree on appropriate test materials and a safe handling and cleanup plan before learners begin. Set boundaries for cutting tools and small parts, and have teams list what they need before collecting supplies. That preparation helps prevent waste and keeps attention on the design question.
How can teachers assess an open-ended STEM project?
Assess evidence of learning, not whether every team’s solution looks alike. Share a simple rubric with criteria such as explaining the problem, documenting a design decision, using observations to support a conclusion, and responding constructively to feedback. Learners can submit a labeled sketch, a short test log, or an audio explanation alongside the finished model. These artifacts help distinguish thoughtful reasoning from a result that may have worked by chance.
How can STEM project ideas be adapted for different grade levels?
Keep a shared real-world prompt, then vary the support and depth expected. Younger learners could sort materials by a visible property and explain their choices with drawings; older students might compare measurements or defend a material choice using recorded observations. Offer a word bank, planning template, or optional extension rather than lowering the core purpose. This lets learners work toward the same broad goal while showing understanding in developmentally appropriate ways.
What should students do after their first STEM design fails?
Pause and help learners describe the result before changing anything. Ask, “What did you expect, what happened, and what evidence do you have?” Then invite the team to choose one adjustment and explain why it might help. If the test still doesn’t succeed, that’s useful information too. A calm debrief, with attention on the design rather than blame, helps learners build confidence in responding to setbacks and making their next decision deliberately.