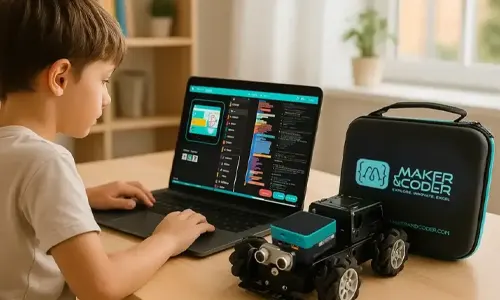
The most capable robot isn’t automatically the best beginner choice. The best block coding robotics kits match the learner’s experience with manageable building steps, an accessible programming interface, and projects that can grow in complexity. For classroom use, consider how easily the kit supports shared activities and fits the learning goals.
It’s understandable to focus on the robot itself, but learning depends on more than its features. Learners need a clear path from assembling a model to using visual code to make it move, respond, or complete a task.
This guide explains what to compare when choosing a coding robot, from building demands and block-based programming to classroom use and kit prices. You’ll also learn how to match a kit to a beginner’s needs and when a more adaptable learning pathway may help. The right choice gives young innovators room to experiment, from their first coded movement to projects that combine hardware and programming.
Key Takeaways
- Match a robot kit to learners’ current skills, then look for room to progress from basic commands to more challenging projects.
- Compare the building process and coding interface with the activities you want learners to complete.
- Assess kit prices by looking at what each kit includes and how well it fits your intended use.
- Plan how learners will share kits around the task, classroom setup, and level of guidance needed.
- Consider MC Blocks as a pathway for learners ready to extend their coding and robotics projects.
How to Choose the Most Suitable Coding Robots
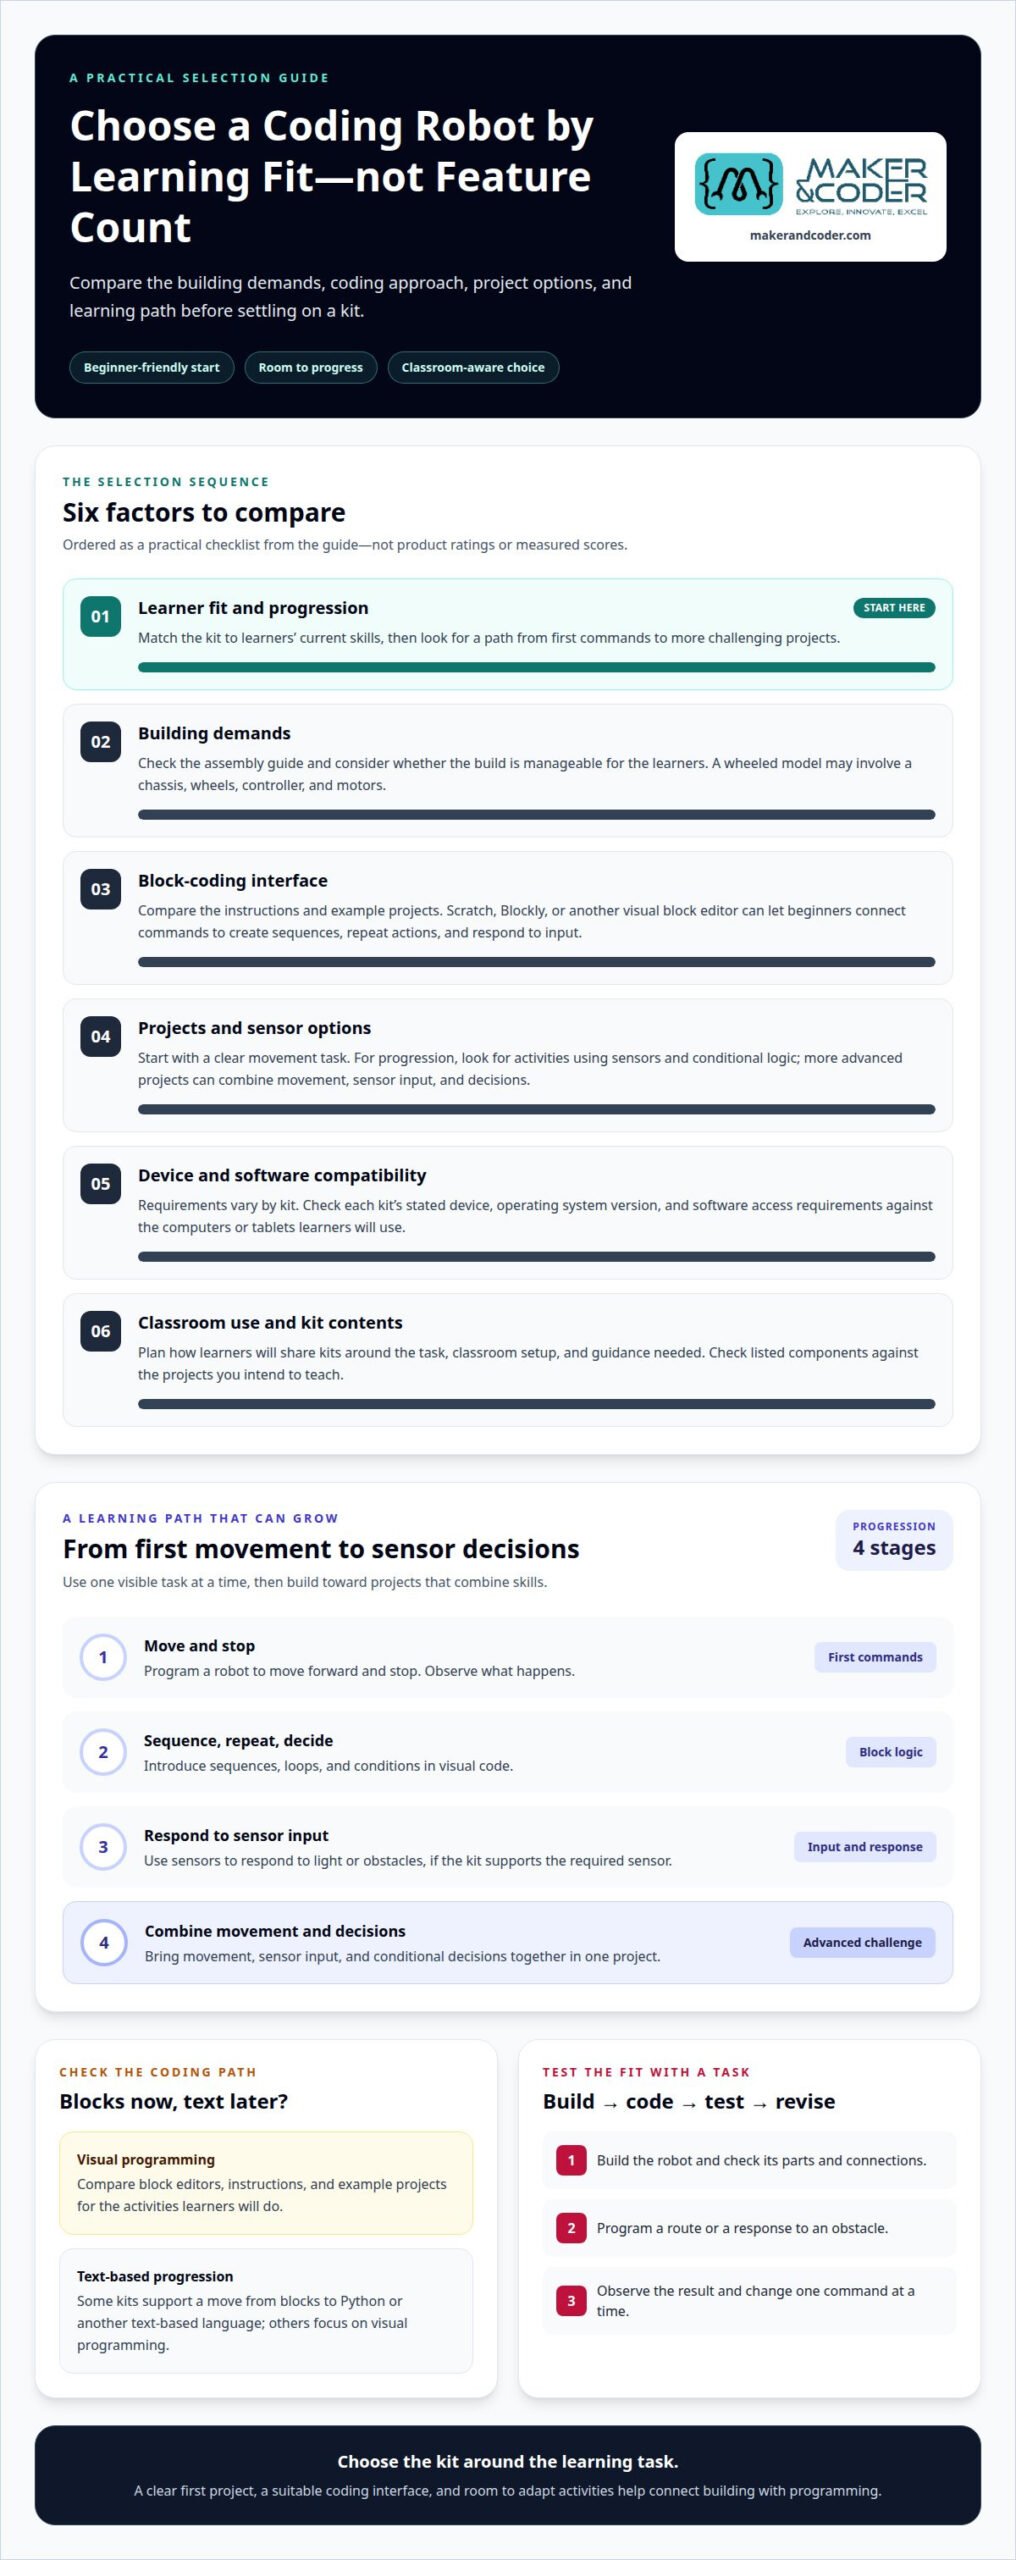
Choose a robot kit by matching its coding approach, building demands, and project options to learners’ current skills. Then plan a progression from first commands to more advanced projects.
Beginner-to-Advanced Learning Progression
Start with a task learners can test immediately, such as programming a robot to move forward and stop. Next, introduce sequences, loops, and conditions, then use sensors to respond to light or obstacles. For a more advanced challenge, combine movement, sensor input, and conditional decisions in one project. Look for kits that let learners adapt tasks without replacing the whole learning pathway.
Block-Coding Platform Options
Which robotics kits use Scratch, Blockly, or drag-and-drop coding? Kits that support Scratch, Blockly, or another visual block editor let beginners build programs by connecting command blocks. Compare the instructions and example projects, then choose an interface learners can use to create a sequence, repeat actions, and respond to input. A platform name alone doesn’t show how well activities fit your lesson.
Next, consider whether the same kit supports a move from blocks to Python or another text-based language. Some kits offer both approaches, while others focus on visual programming. Choose a progression that builds on familiar projects as learners encounter written syntax, such as translating a movement command into code.
Device and Operating System Compatibility
What devices and operating systems are compatible with popular kits? Requirements vary by kit and its coding software, so no single device or operating system applies to every option. Compare each kit’s stated requirements with the computers or tablets learners will use, including the operating system version and how the software is accessed. This helps prevent planning a lesson around an unavailable device.
Use a practical activity to assess whether a kit supports your learning goals. For example, learners can build a robot, program a route, and adjust its response when a sensor detects a change. An AIoT add-on kit can extend a project with additional components. Connect each activity to a topic, such as sequencing, loops, input, or designing and testing a solution.
- For a first project, choose a clear movement task and visual blocks.
- For progression, look for activities that introduce sensors and conditional logic.
- For advanced learning, compare options for text-based programming and open-ended builds.
Robot Building and Programming
Building a coding robot turns a design into a machine learners can control. A small wheeled robot, for example, combines a chassis, wheels, a controller, and motors. Learners assemble the parts, then use code to give the robot a task. This sequence connects hands-on construction with programming and practical problem-solving.
Robot Building and Assembly
Start with the assembly guide and identify each part before attaching it. For a wheeled model, learners can connect the chassis, mount the motors, attach the wheels, and position the controller. Then check the build: are both wheels secure, and are the motor connections in the intended ports? A careful check makes later testing easier to interpret.
Assembly can also be a practical design activity. Ask learners to build a simple frame, test whether it rolls smoothly, then adjust a loose wheel or uneven support. In class, small groups can divide roles: one learner follows the diagram, another handles parts, and a third records changes. They learn by making and explaining design decisions, not just completing a model.
Programming and Testing
Once the robot is assembled, start with one command. Program it to move forward, observe the result, and adjust the movement block if it travels too far. Add a turn command, then combine the actions into a route around a book. This progression makes each code change visible and gives learners a specific result to assess.
For a more involved activity, try a sensor-based task if the kit includes the required sensor. Learners might program a robot to stop when it detects an obstacle, then test how changing the condition affects its response. The cycle is simple: build, code, run, observe, and revise. Each test helps clarify how instructions affect movement.
- Assembly: Follow the diagram and check that parts and connections are secure.
- First program: Use one movement command, then compare the robot’s action with the intended result.
- Revision: Change one command at a time to identify what improves the task.
Choose projects that make the link between construction and code easy to see. A robot following a short route helps beginners practise sequencing; responding to an obstacle introduces conditions and sensor input. As learners gain experience, invite them to redesign the route or adapt the robot’s structure for a new challenge. The build is a starting point for experimentation, not the final goal.
Robot Kit Prices
Robot kit prices reflect more than the robot’s frame. A kit with a controller, motors, sensors, and construction parts offers different project options from a basic build. The market reference for an mBot robotics kit is around 56 USD, based on four price samples from three sources collected on November 21, 2026. This is market context, not a price for every kit.
Compare what learners can build and program, not just the number of components. A simple wheeled robot may suit movement sequences, while a kit with sensors can support obstacle-response activities. A teaching plan with several builds may also differ from a home project focused on one learner’s creativity. Start with the task, then consider which parts are needed.
Check the kit’s listed contents against the project requirements. A route-planning activity needs a robot that can move and turn; a sensor-based challenge requires a compatible sensor. Consider whether the coding environment and learning materials suit the learners, too. These details explain why kits with similar-looking robots can serve different purposes.
- Parts: Identify included controllers, motors, sensors, and building pieces.
- Projects: Match the kit’s components to a defined activity, such as navigating a marked route.
- Learning path: Consider whether learners can progress from basic commands to more complex programs.
- Classroom use: Compare the number of complete builds needed with how learners will share and work.
For a practical buying decision, write down a beginner project and a follow-up challenge. A robot might first travel between two markers, then follow a route and respond to an obstacle. Compare the required parts and programming options with each kit’s contents. This helps distinguish a lower initial price from a better fit for your teaching plan.
For school purchases, consider how the kit will support lessons over time, rather than judging value by a single activity. A kit that supports repeated builds and varied programming tasks may suit a longer learning sequence. For a one-off demonstration, a simpler setup may be more appropriate. Match the purchase to the projects, learners, and classroom setup before comparing options.
Robotics Kits for Children and Students
Choose a kit by matching its assembly demands and coding tasks to learners’ skills. A child who can follow illustrated steps may enjoy building a wheeled robot, while students ready to plan can design and test a route. Follow the age label and manufacturer instructions, and provide adult supervision during assembly and powered activities.
For younger children, begin with a build that has clearly identified parts and a simple first task, such as making a robot move along a marked path. They can learn through hands-on assembly before adding more complex code. For older learners, consider projects that combine movement, sensors, and decisions, such as programming a robot to respond to an obstacle.
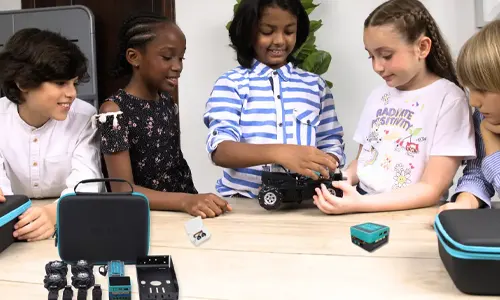
Schools can choose how students share kits based on the activity. For individual practice, a kit per student gives each learner direct experience with assembly, coding, and testing. For collaborative projects, students can share a kit in a small team, with roles such as builder, programmer, and test recorder. Rotate roles so each student works with the robot and its code.
Plan group work around the task rather than a fixed ratio. A short demonstration may work with shared access, while a lesson focused on repeated coding practice benefits from more individual time with the robot. When a team shares one build, give each learner a defined contribution: one can plan the route, another program it, and another record the results of each test.
Before selecting a classroom kit, consider the reading, coordination, and programming skills its activities require. Illustrated assembly steps can support learners who are new to building; drag-and-drop coding makes command sequences easier to inspect. Guiding a robot around classroom markers gives children a visible goal and a clear result to discuss.
- For beginners: Choose a manageable build and a first task with an observable outcome.
- For developing learners: Add sensors or route choices when basic commands feel familiar.
- For shared kits: Assign practical roles, then rotate them so students gain varied experience.
- For safety: Follow the kit’s age guidance and safety instructions, especially during assembly and operation.
The best arrangement supports meaningful participation. Match the kit’s complexity to learners, and structure sharing so every student contributes through building, programming, or testing.
Coding Robot Kits for Robotics and Coding Education
A coding robot makes abstract instructions visible: learners can see how a program changes a machine’s actions. In a classroom route challenge, students plan a path, arrange movement commands, and compare the robot’s actual route with their intended one. This cycle connects coding with practical design and problem-solving.
Build learning around a clear objective. Ask students to guide a robot between marked points without touching classroom obstacles. They can break the task into steps, sequence commands, and revise the program after testing it. A visual coding interface helps beginners inspect each instruction and see how changing a command affects the result.
Progress the challenge by introducing one new idea at a time. Start with movement commands, then add repetition so learners don’t need to enter the same action several times. Next, use a condition to make the robot respond to input, such as a sensor detecting an obstacle. Learners practise sequencing, loops, conditions, testing, and explaining a program’s behaviour.
Robotics and coding education also benefit from open-ended tasks. Invite learners to design a robot that delivers a small object to a chosen destination, then define their own route and success criteria. One student can map the path, another write the code, and a third record test results. Rotating roles lets everyone practise technical and communication skills.
- Plan: Define a visible goal, such as reaching a marked destination.
- Program: Arrange movement instructions or supported visual blocks.
- Test: Observe where the robot diverges from its planned route.
- Improve: Change a command, run the program again, and explain the result.
For learners ready to move beyond blocks, a kit that supports text-based coding can connect visual logic with languages such as Python. The transition works best when the task stays familiar: learners can first guide the robot with blocks, then recreate the sequence in text. This keeps the focus on how code works, rather than introducing a new project and syntax at once.
Choose projects that connect a coding concept to an observable robot action. A marked route can teach sequencing; an obstacle challenge can introduce conditions and sensor input. With each new task, learners move from following instructions to designing, testing, and improving their own solutions.
Maker & Coder: MC Blocks
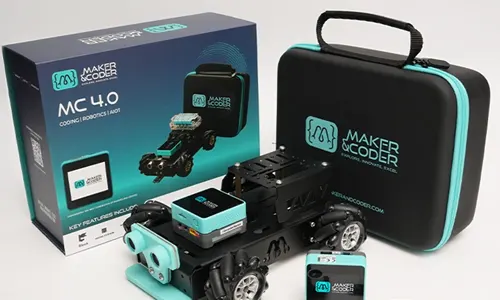
Maker & Coder offers MC Blocks as a next step for learners exploring block-based robotics and coding. Its modular MC Blocks sit within an educational ecosystem centered on the MC 4.0 hardware platform. This makes the offering relevant when a school or educator wants to connect coding activities with a structured robotics learning pathway.
Consider MC Blocks when learners are ready to move beyond isolated coding exercises and work through a sequence of projects. The next step depends on their learning needs: practising programming concepts, applying them with robotics hardware, or following a planned progression. Identify the learning objective first, then choose the offering that aligns with it.
For structured learning across grade levels, the MC Curriculum (K-12) is designed to integrate with Maker & Coder hardware. This can help educators connect a lesson’s coding objective with a practical project, rather than treating the robot and the program as separate activities. For example, a class could use a curriculum pathway to organize how learners encounter coding and robotics concepts over time.
The Multi coding kit is another option for a coding-focused pathway. Compare your learning goals and classroom needs with the available options. Decide whether your priority is a structured curriculum, modular coding activities, or a kit-based learning experience. This keeps the choice focused on learners and the instruction you plan to provide.
- Choose MC Blocks when modular coding is the focus of the next learning step.
- Consider the MC Curriculum (K-12) when a structured pathway aligned with hardware is important.
- Explore the Multi coding kit when selecting a kit-based option for coding education.
For schools, teachers, and families, the key question is how each option fits learners’ current projects and future goals. Start with the skills they are practising now, then consider what they should be able to create next. A clear goal makes it easier to select a pathway that connects coding instruction with hands-on robotics learning.
To discuss which learning pathway fits your goals, contact Maker & Coder.
Maker & Coder for Block Coding Robotics Kits
Maker & Coder provides a learning ecosystem centered on the MC 4.0 hardware platform and modular MC Blocks. If you’re choosing block coding robotics kits for structured technical learning, its MC4.0 Controller and Base, AIoT, and other kits offer hardware options to explore.
For a guided educational pathway, Maker & Coder’s K-12 MC Curriculum is designed to integrate with its hardware. The company also offers Teacher Training Programs, alongside options including the AI Kit, IOT Kit, Multi coding kit, and AIOT Learning kit.
Frequently Asked Questions
What are the best block coding robotics kits for beginners?
For beginners, choose a kit with block-based coding, guided learning materials, and a progression to text-based programming. Maker & Coder’s MC 4.0 Base Kit is listed for ages 07 Years – 15 Years and supports block coding, with optional progression to Python or Arduino. It can suit learners who want to begin with visual commands and later explore other programming approaches. Match the kit to the learner’s age guidance and project goals.
What is the typical price range for block coding robotics kits?
Prices vary by kit and its components. Compare the listed contents and intended projects before deciding. All listed prices are Duties & Taxes Excluded.
Which kits include motors, sensors, and rechargeable batteries?
Maker & Coder’s MC 4.0 Base Kit includes four DC encoder motors, an ultrasonic sensor, a line-follower sensor, and a battery module. The MC 4.0 AIOT Robotics Kit includes four DC encoder motors, two servo motors, an environmental sensor, and a battery pack. The listed component descriptions don’t identify either battery as rechargeable, so compare the manufacturer’s product details for the power requirements of your intended project.
How do you set up and program a block coding robotics kit?
Start by following the kit’s quick-start guide to assemble the robot and connect its listed components. Then use the supported block-based coding environment to create a short program, such as moving forward and turning. Maker & Coder’s MC 4.0 controller supports multiple programming languages, including Scratch, Python, Arduino, Blockly, and MCLab. Begin with blocks, then explore another supported language as learners’ coding goals develop.
Are block coding robotics kits suitable for classroom use and group projects?
Yes, kits can support classroom activities and collaborative projects. Maker & Coder’s school kits include lesson plans, and its K-12 MC Curriculum is designed to integrate with the hardware. For a group task, students can plan a robot’s route, program its movements, and record test results. Assign roles such as programmer, builder, and recorder, then rotate them so learners experience different parts of the project.