A new add-on isn’t always the cause of a broken setup. To troubleshoot an AIoT add-on, first test it on its own, then enable other add-ons one at a time. This helps show whether the issue lies with the add-on or an interaction between components.
It’s frustrating when a feature stops working or an add-on won’t load, especially when several changes could be responsible. Compatibility can depend on version differences, load order, and overlapping functions. Checking each factor separately makes the problem easier to diagnose.
This guide explains how to narrow down common bugs, try practical fixes, and assess compatibility with other add-ons. Learn how to identify a likely conflict and evaluate the components involved. A controlled diagnosis can replace guesswork and help you make informed decisions about your setup.
Key Takeaways
- Distinguish an add-on that extends an existing setup from a complete AIoT platform.
- Learn which compatibility details can affect how add-ons work together.
- Use a structured installation and configuration process to narrow down common issues.
- Assess whether an add-on’s capabilities suit your project or learning goals.
- Explore how structured curriculum, coding tools, and hardware can support hands-on learning.
Compatibility with other add-ons
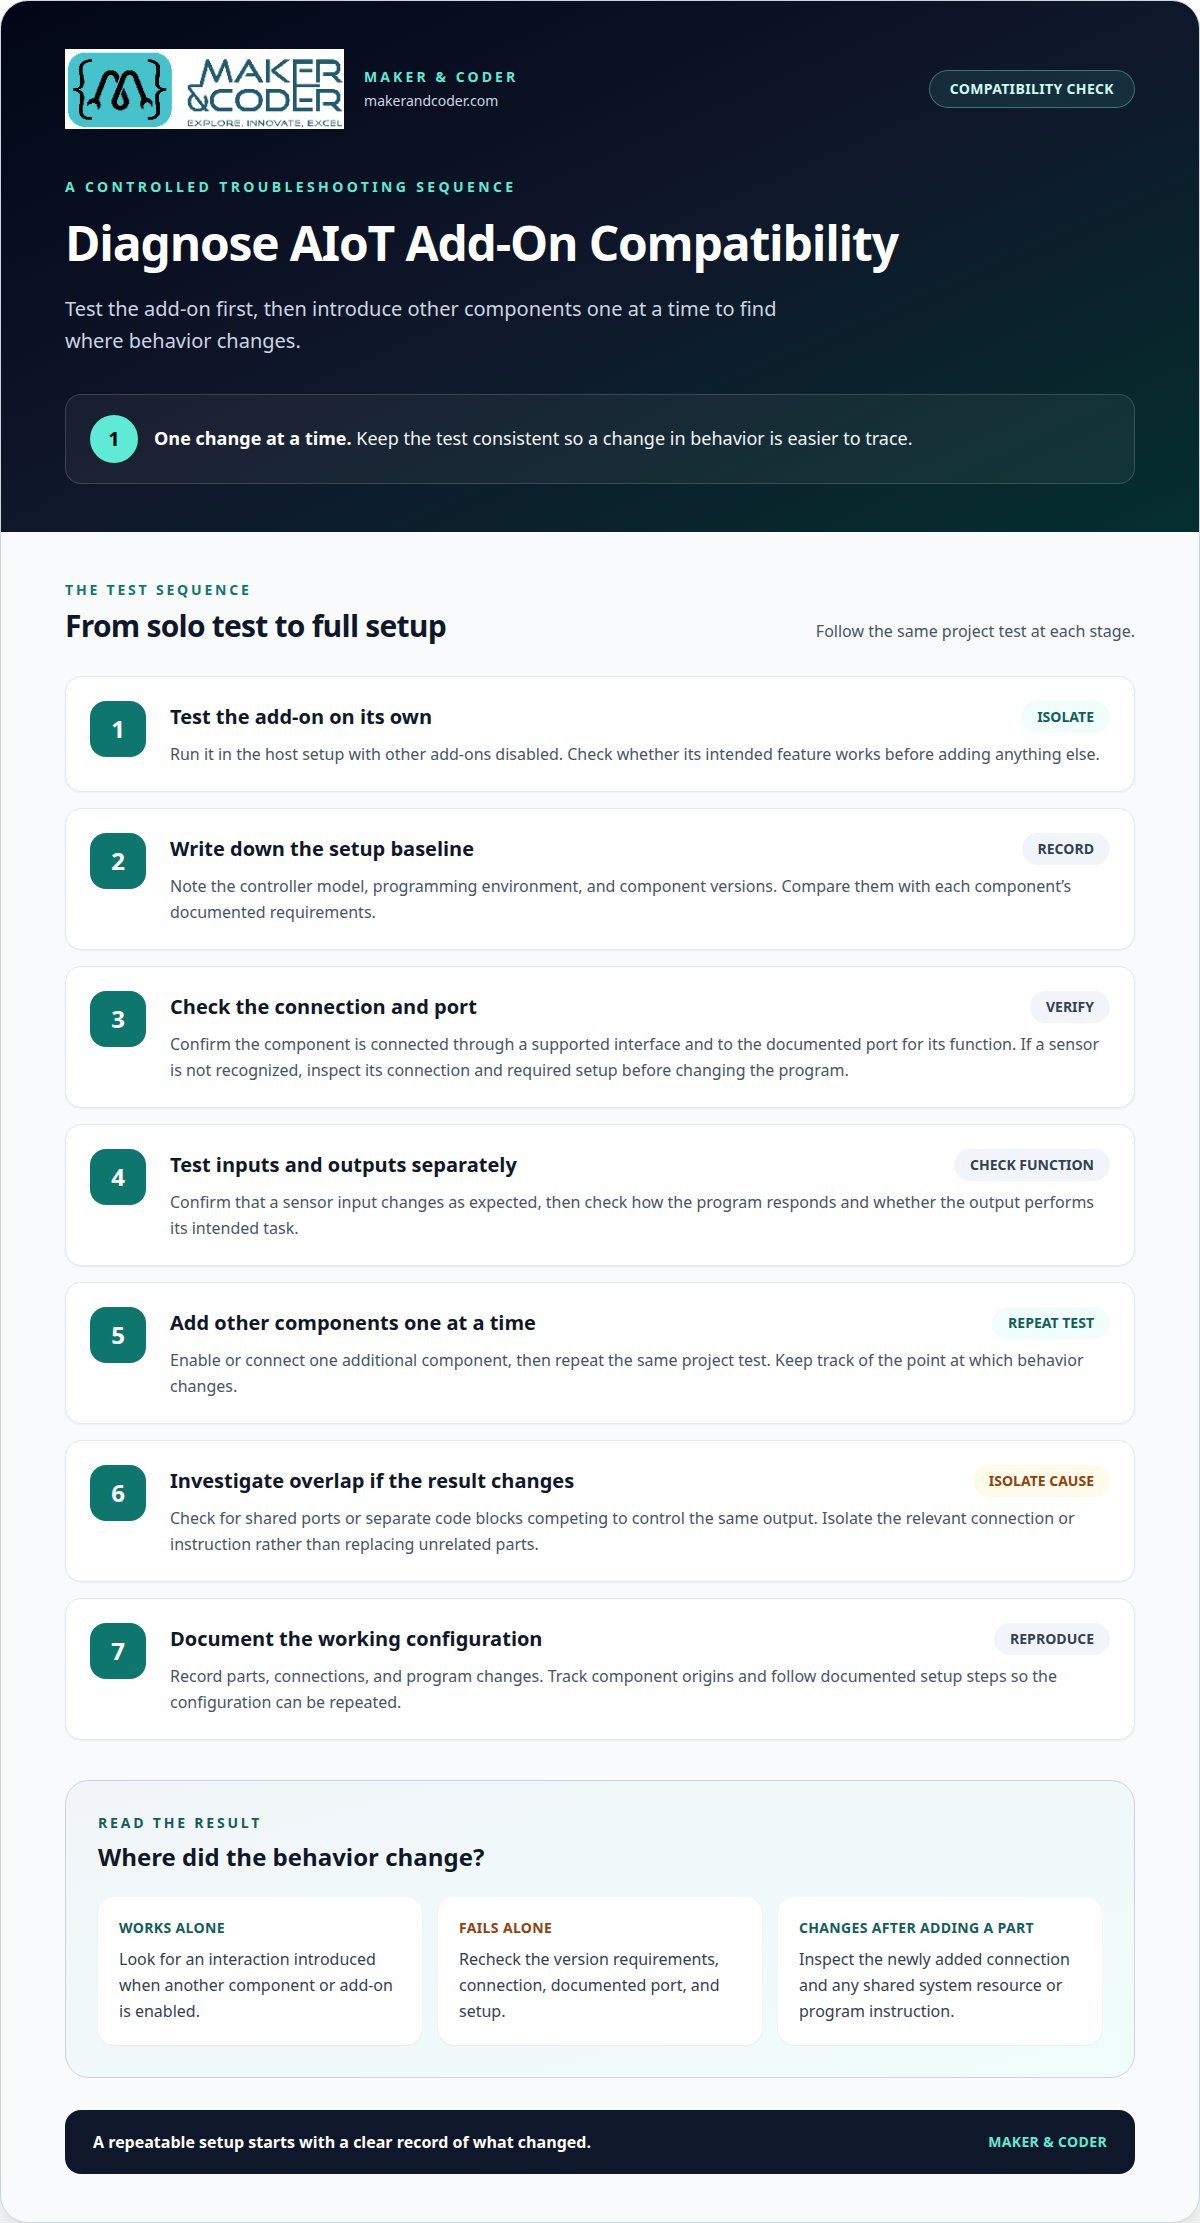
Compatibility means components work together as intended within a host system. For an AIoT add-on, assess the controller, software, connections, and other attached modules separately. A sensor and a motor module, for example, have different roles but may depend on the same controller and program. A setup that starts successfully doesn’t prove that every input and output works correctly.
Version matching means using software and components that support the same host environment. A mismatch can cause a module to go undetected or a program to behave unexpectedly. Before testing, record the controller model, programming environment, and component versions. Compare these details with each component’s documented requirements. This gives you a useful troubleshooting baseline without assuming similarly named parts share the same requirements.
Connection compatibility means a component can connect through a port or interface supported by the host. A sensor, for example, may need a specific input connection, while a motor module uses an output connection. Check the documented port and function before assembling the project. If the controller doesn’t recognize a sensor, inspect its connection and required setup before changing the program.
Resource overlap occurs when multiple components or programs rely on the same system resource. Two modules might need the same port, or separate code blocks might compete to control one output. Test the project with one component active, then add another and repeat the same action. If the output changes, isolate the relevant connection or program instruction instead of replacing unrelated parts.
Functional compatibility means each component performs its intended task within the complete project. A practical test could confirm that a sensor input changes as expected before a program uses it to control a motor. Check the input, program response, and output separately. This reveals where behavior changes and helps learners understand how the components interact.
Compatibility also involves careful handling of digital components. IoT devices and systems can be compromised during development, creating vulnerabilities in manufacturing or transport, according to the National Institute of Standards and Technology. Use documented setup steps and track component origins. For classroom projects, a simple record of parts, connections, and program changes helps educators reproduce a working configuration.
- Record the controller, software environment, and component versions.
- Match each component to its documented port and function.
- Test each input or output independently before combining parts.
- Add components one at a time and repeat the same project test.
- Note configuration changes so the setup can be reproduced.
What products or services are called AIoT add-ons?
An AIoT add-on is an optional product or resource that extends a learning setup involving connected devices and intelligent technology. The term describes how something relates to a host system, rather than naming a standard product. In a classroom project, an add-on might introduce a component, learning activity, or programming resource. Its purpose depends on the needs of the existing setup.
A hardware add-on is an extra physical part used with a main device or kit. In a robotics activity, an additional sensor or actuator can give learners more ways to interact with a build. Its role depends on the project: one activity might collect information, while another creates movement. Product descriptions clarify the intended use, rather than relying on assumptions based on a component’s name.
A software add-on is a digital resource that extends an existing program or learning environment. It could provide a programming activity, instructions, or a tool for a project. For example, a lesson resource might guide learners through a new coding challenge without adding physical hardware. Its value depends on whether it supports the software and learning goals already in use.
A learning-resource add-on is supplementary instructional material that expands an existing course or activity. It might provide a project brief, teaching guidance, or additional practice with a concept. An educator could use it to extend a lesson from basic device input to a more complex programmed response. This kind of resource develops the learning pathway rather than changing the hardware.
An AIoT service add-on is an optional service or digital capability that supports an existing connected-device setup. The phrase can mean different things across products, so identify the named service and its role. A service might support device information or project workflows, depending on the system. Don’t assume a product includes data storage, remote access, or other functions unless its description says so.
Classify the offering before comparing options:
- Physical component: Determine what part of the build it adds.
- Software resource: Identify the program or learning environment it extends.
- Instructional material: Note which activity or learning goal it supports.
- Digital service: Describe the specific task it performs within the setup.
Clear classification makes planning and communication easier. Instead of saying an add-on is needed, describe the project gap, such as needing more practice with programming or an additional way to interact with a robot. For help shaping an AIoT learning project, discuss your project requirements.
What features does an AIoT add-on provide?
Data collection is the capture of information from a device or its environment. A sensor-based add-on might read light, temperature, or movement. For example, a light sensor can provide changing input for a programmed response. The host system must be able to receive and interpret the information. Check what the specific component measures and how its software represents the values.
Connectivity is the ability to exchange information between devices or software. Depending on its design, an add-on may connect a sensor-equipped device to another system, allowing measurements to be sent for display or further processing. Connectivity doesn’t automatically mean internet access, remote control, or cloud storage. Those functions depend on the product’s components, software, and supported connections.
AI processing is the use of a model or algorithm to interpret data and produce an output. An AI-enabled add-on might classify an image or recognize a sound if its platform supports that task. For example, a camera project could process an image and respond to a recognized feature. The result depends on the model, input quality, and processing method. The label alone doesn’t specify which AI functions are included.
Automation is a programmed action that follows an input or condition. A project might turn on an indicator when a sensor reading reaches a chosen threshold, or use a recognized sound to trigger a response. These are possible project designs, not universal add-on features. The add-on must provide the necessary input or output; the program defines the behavior.
Data presentation is the display of collected or processed information. A compatible add-on might show a sensor reading in a software interface, making changes easier to observe during a project. Learners, for example, could compare how a light reading changes as an object moves. Distinguish display from storage: showing a value doesn’t mean the system saves it for later.
Integration is how an add-on works with a host device, program, or other component. This may involve a physical connection, a software dependency, or both. A sensor reading, an AI result, and a programmed response are separate stages in a project. Identify which stage the add-on handles, then confirm what the host system must provide. This makes feature comparisons more precise.
- Input: Identify whether the component captures images, sound, or sensor readings.
- Processing: Determine whether it interprets data or passes it onward.
- Output: Note whether it displays information or triggers a programmed action.
- Dependencies: Record the host device, software, and connections needed.
Use these categories to compare actual product descriptions instead of assuming every AIoT add-on combines sensing, connectivity, AI, automation, and storage. A classroom project that reacts to light needs different functions from an image-recognition activity. Matching the feature to the task gives you a clearer basis for selecting components and planning the next build.
How do you install and configure an AIoT add-on?
A prerequisite is a required device, software version, connection, or account. Before installing an AIoT add-on, identify its host platform and read its setup instructions. For a hardware module, note the named controller, connector type, and power requirements. For downloadable software, identify the supported application and package format. These details determine the installation path and help prevent mismatched components.
Installation is the process of adding a component to its host system. Keep the original setup unchanged until you’ve recorded its current state. Then follow the package’s documented method, such as connecting a module to its designated port or importing a file through the host application. Don’t substitute a similar-looking connector or install an unrelated package. If installation displays an error, record its exact wording before making changes.
- Prepare the host. Confirm the device or application starts normally without the add-on. Note its displayed version and any listed dependencies.
- Connect or import. Follow the component’s instructions. For example, connect a sensor to its specified port, or add a software package through its host application.
- Confirm detection. Look for the component name or a recognized input in the host interface. A sensor that fails to appear points to connection, power, or dependency issues.
- Configure inputs. Select the intended source, such as a sensor reading or camera input. Match the program’s input selection to the connected component.
- Save and restart. Save the configuration, restart the host if its instructions require it, then reopen the project.
Configuration is the selection of settings that connects an add-on’s inputs, processing, and outputs. Start with one simple task, such as displaying a sensor reading before programming a response. Change one setting at a time. If a project uses a camera input, first confirm that the host receives an image. Add recognition or automation only after the input works.
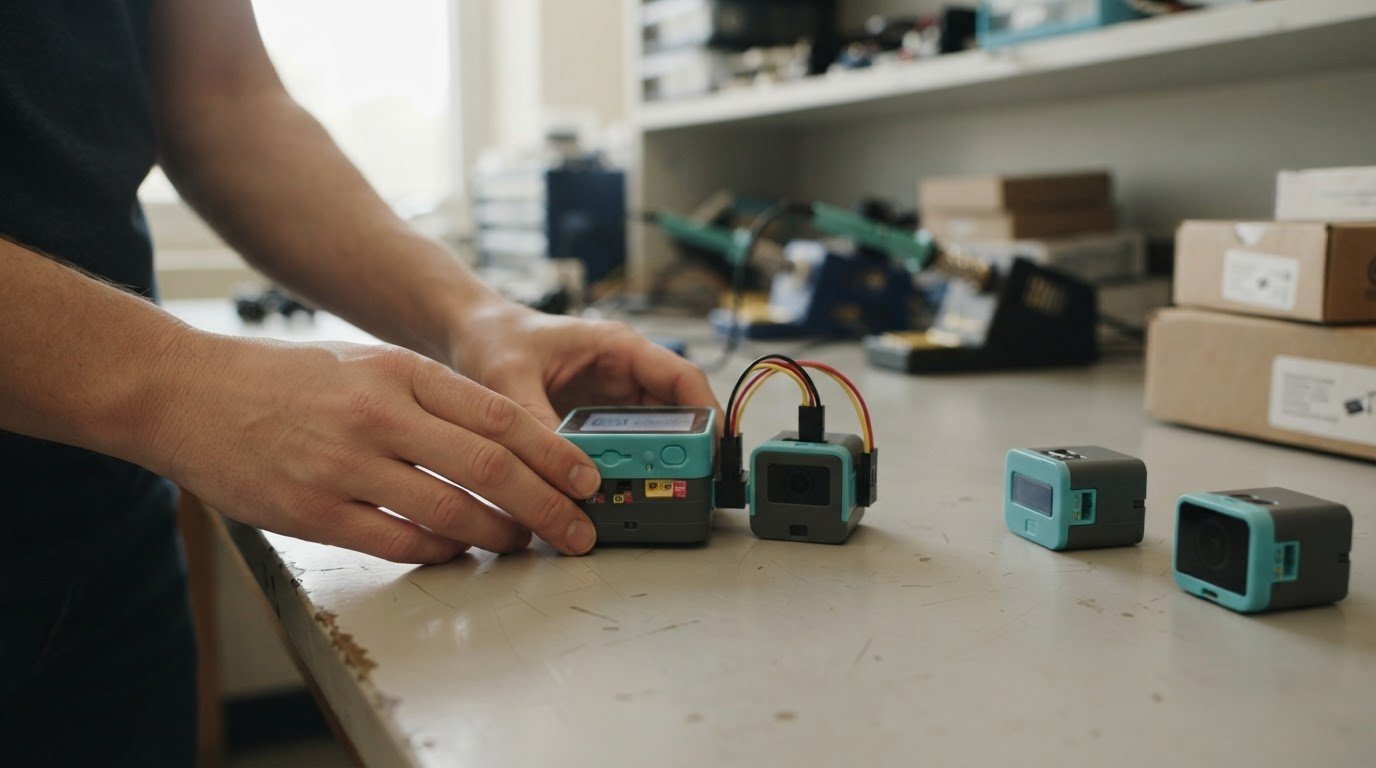
Validation is a repeatable test showing that an installed component performs its intended task. Run the same test before and after changing a setting. Record the input, expected result, actual result, and any message shown. If a feature fails, disconnect other optional components and retest the add-on alone. Then restore components individually. This separates setup errors from interactions with other parts of the project.
For a classroom activity, document the component name, host version, connection used, configuration choices, and test result. This gives the next learner a clear starting point and makes troubleshooting more precise.
How does an AIoT add-on compare with a standalone AIoT platform
An add-on is a component that extends an existing host system. A standalone platform is a system designed to perform its core functions without relying on another host. A sensor module connected to a programmable controller illustrates an add-on; an integrated device-management system illustrates a standalone platform. These labels describe architecture, not guaranteed features. Compare the actual components, software, and supported workflows.
Dependency is the degree to which a solution relies on another product. An add-on depends on its host for some combination of power, processing, connectivity, or software. A camera module, for example, may need a compatible controller and program to process images. A standalone platform may bring functions together while still depending on outside connections or services.
Integration effort is the work required to connect components and make them operate together. With an add-on, map the host, connection, software, and intended task before building. A sensor-based project, for example, needs a compatible input and code that interprets its readings. A standalone platform may reduce separate connections while requiring users to learn its own interface and workflow.
Flexibility is how easily a setup can adapt to a different project or component. An add-on approach lets a project expand with compatible modules, such as a new input for a different experiment. A standalone system may offer a more integrated path within its own design. Either way, flexibility depends on supported components, software access, and the ability to change the project.
Maintenance scope is the set of components and dependencies that need attention. An add-on setup may involve the host, module, program, and connection, so a fault can arise at any point. A standalone platform concentrates more functions in one system, but its software and connected devices still need attention. Keep a component list and record which parts change during maintenance.
Use the project goal to guide the choice:
- Choose an add-on approach when an existing host meets the project’s needs and an extra component supplies a specific function.
- Consider a standalone platform when the project needs a more integrated system and its built-in workflow fits the task.
- Compare the full setup by listing required hardware, software, connections, and learning steps.
- Plan for growth by identifying which future components or tasks the architecture can support.
A classroom exploring sensor inputs may benefit from an extendable setup; a project needing a unified operating workflow may suit a standalone design. Neither architecture is automatically better. Match the choice to the task, available components, and desired learning path. Discuss the right AIoT learning approach for your project.
Maker & Coder
Maker & Coder helps schools and learners turn AIoT concepts into structured, hands-on programming projects. The AIoT learning pathway can complement practical work, while MC Blocks supports block-based coding and the MC Curriculum (K-12) helps organize learning activities. Teacher Training Programs can support educators building confidence with classroom technology.
Consider these resources when planning a project, choosing a learning sequence, or helping teachers guide students from basic coding to connected-device activities. They offer a relevant next step once you’ve identified what your add-on needs to do and how it fits your learning goals.
Contact Maker & Coder to discuss your learning or project needs.
Build a More Confident AIoT Project
Make troubleshooting a stronger foundation for your next build. Treat each AIoT add-on as part of a wider learning process: set a clear project goal, develop the code in manageable steps, and use each test result to guide your next decision. This approach can help learners move from following instructions to designing and refining their own ideas.
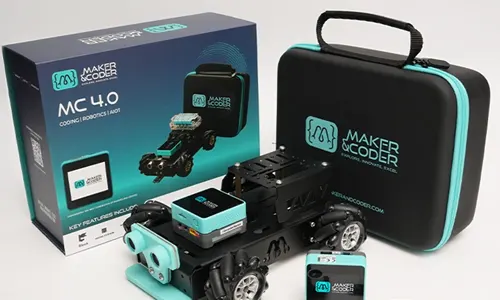
Maker & Coder supports that progression with the MC 4.0 Kit, MC Curriculum (K-12), and MC Blocks. Together, these offerings connect practical building with structured learning and block-based programming. They can be a useful next step for educators planning technology activities or learners ready to develop their skills through hands-on projects.
Bring your project goals or classroom needs to the next conversation. Contact Maker & Coder to explore a suitable learning path, and keep building with curiosity and confidence.
Maker & Coder’s AIoT learning resources
Maker & Coder provides a technical learning ecosystem centered on the MC 4.0 hardware platform and modular MC Blocks. Its MC4.0 Controller and specialized Base and AIoT kits support technical learning.
If you are considering an AIoT addon for structured K-12 learning, Maker & Coder also offers an MC Curriculum designed to integrate with its hardware. The MC4.0 AIoT Kit is a relevant option to explore alongside that curriculum.
Frequently Asked Questions
What does AIoT addon mean?
An AIoT add-on is an optional hardware or software component that extends a system combining artificial intelligence and internet-connected devices. For example, a sensor can provide information for a programmed project, while compatible software processes or uses that input. The term alone doesn’t identify a specific feature. Check the named product and its function to distinguish a sensor module, software extension, or complete learning kit.
What hardware and software are compatible with AIoT add-ons?
Compatibility depends on the add-on’s host, connection, and supported software. Maker & Coder’s AIoT Robotics Kit includes an MC4.0 Controller, AI Camera, environmental sensor, and relay module, and supports Scratch, Python, and Arduino. Its cloud connections work with AWS and Azure. These details describe that kit, not every add-on. Match a component’s documented requirements to the controller, program, and connection used in your project.
What privacy and security risks do AIoT add-ons pose?
IoT devices and systems can be compromised during development, creating vulnerabilities in manufacturing or transport. Follow documented setup steps and keep track of component origins.